

I’ve written before about what Canva actually is and what it costs in India, and about what you get on Free vs Pro Lite vs Pro. Both of those covered Magic Studio in a summary line or two — enough to know what it is, not enough to know what it’s actually like to use.
A quick scope note before we start: Magic Studio is a big umbrella — it also covers things like Magic Design, Magic Write, Magic Switch, Magic Morph, and Magic Animate, spanning presentations, video, translation, and copywriting, not just photos. This article sticks to one slice of that: the Canva AI photo editing tools, the ones you’d actually reach for when you have a photo or graphic that needs fixing, extending, or reworking. I ran eight of these back-to-back on my own Canva Pro account, on real images I actually use for TechMitra, and tracked what each one did, how long it took, and how much of my monthly AI allowance the whole session actually cost. No stock demo images, no marketing screenshots — just what happened when I pointed these tools at my own work.
Disclaimer: This article is not sponsored by Canva. Every test here was run on my own Canva Pro subscription, which I pay for myself, using images I created or own the rights to — my own published banners and featured graphics, not anyone else’s photos or work. Nothing here reflects any partnership or paid placement with Canva.
Table of Contents
Also Read : ChatGPT’s Canva Plugin: What Works, What Doesn’t (Real Test)
Where to Find These Tools
A couple of these tools sit in different places, and it wasn’t always obvious on first look:
- Magic Layers is a standalone tool — it shows up on the Canva home dashboard’s tool row once you scroll (under Create), separate from the image editor entirely.
- Magic Edit, Magic Eraser, Magic Expand, Magic Grab, Background Remover, and Background Generator all live inside the same place: upload or select an image, click Edit image, and they’re grouped in the left sidebar under Enhance and Reimagine.
- Magic Media isn’t in that same sidebar — I had to search for it in the Apps panel, where it sits alongside tools like Background, Bulk Create, AI Voice, and Cartoonify.
Worth knowing before you go looking for any of them, since they’re spread across at least three different menus.
Magic Layers — Splitting a Flat Image Into Editable Layers
This one surprised me the most. I fed it a flattened PNG banner I’d already published — my AI Prompts Generator for Resume Writing tool banner, which has a heading, subheading, four icons, a laptop mockup, a resume photo, and a badge circle all baked into one image.
You select or upload the image, and Canva scans it — about 10 to 15 seconds in my test — then hands you back every element as its own independent layer.

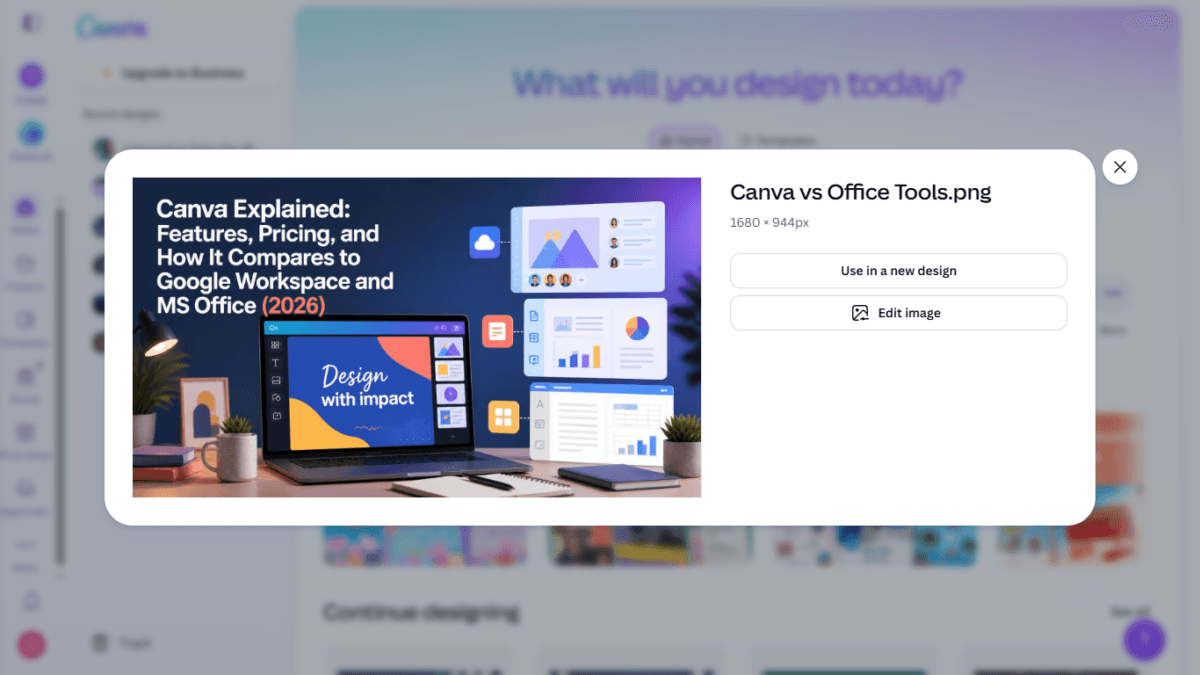
SCREENSHOT:Canva dashboard showing the Magic Layers tool entry point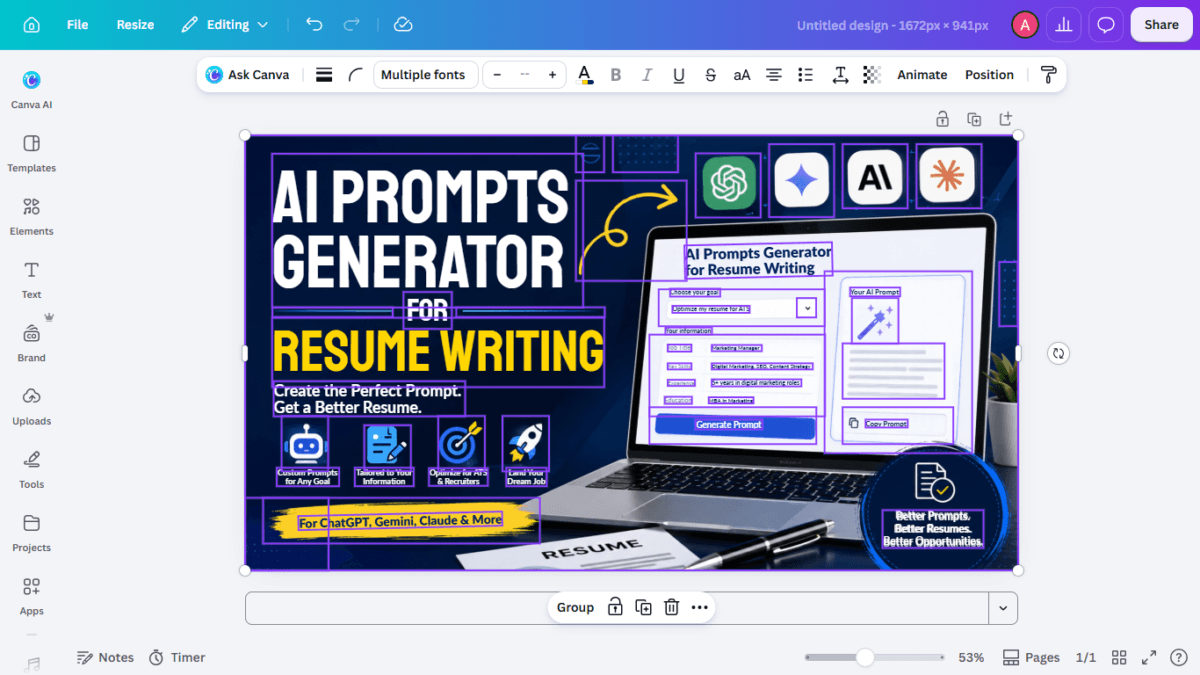
SCREENSHOT:the fully expanded layer view, every element (heading, icons, laptop, resume photo, badge) boxed out separately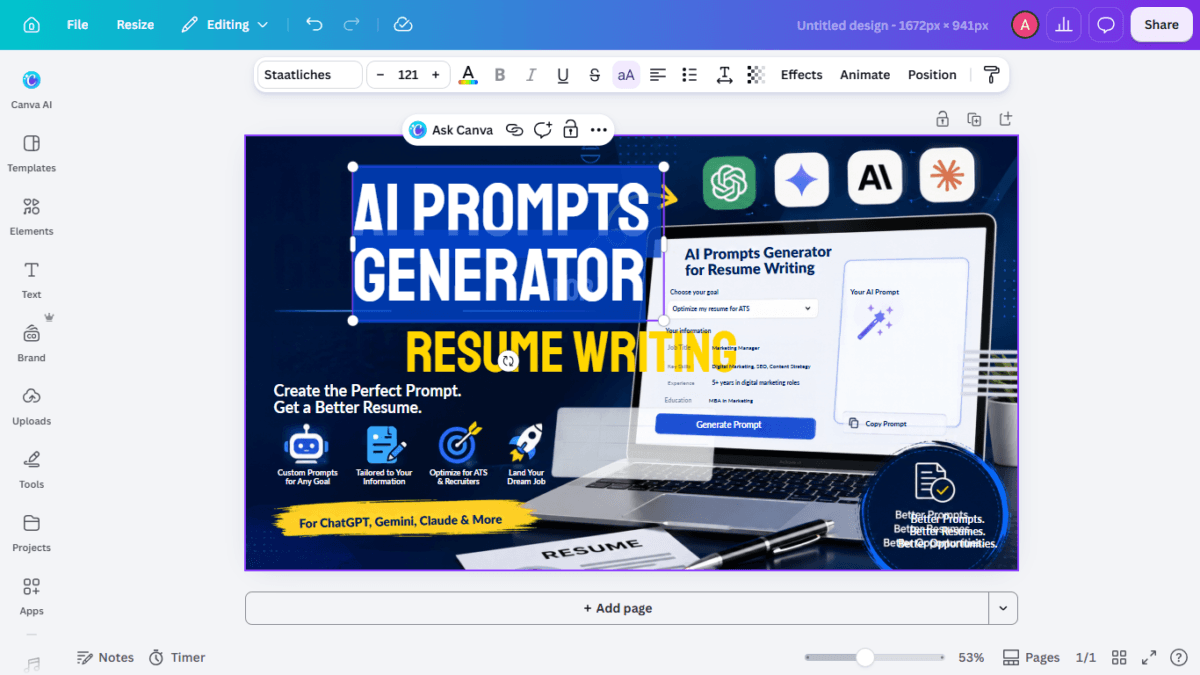
SCREENSHOT:the banner with one text layer selected and highlighted, showing it's independently editableI dragged one of the icons and it moved freely, sliding over the top of the heading text behind it, which confirmed these weren’t just visually separated boxes — they were genuinely independent, stacked layers I could reorder, move, or delete on their own.
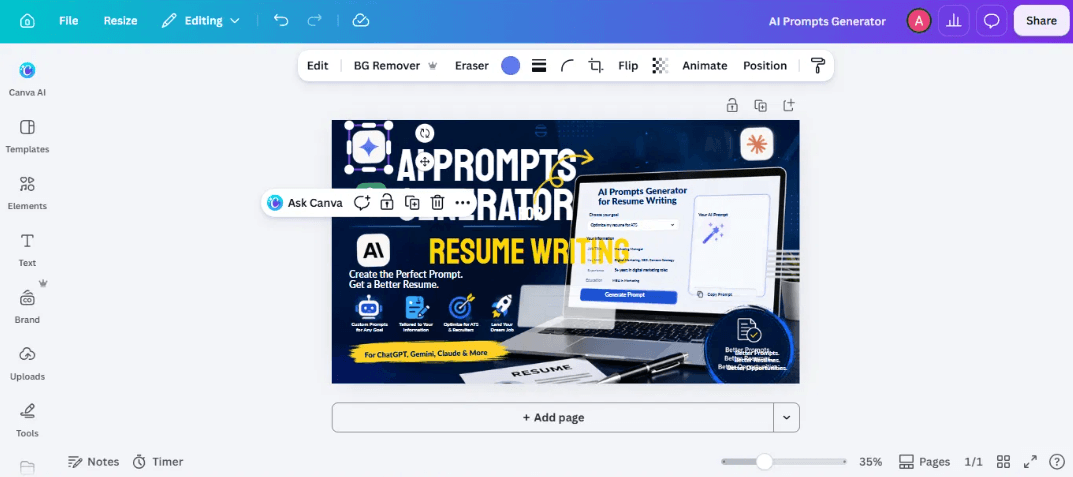
SCREENSHOT:one icon dragged and repositioned, overlapping the text behind it, proving the layers move independentlyMy take: genuinely useful if you’ve ever lost the original design file for something and only have the flattened export left. I checked my AI usage counter after the test, but I couldn’t see a noticeable change from this particular Magic Layers run — I won’t claim what billing tier that puts it in, since Canva’s own documentation currently lists Magic Layers as a premium AI tool whose usage counts toward the monthly allowance, which doesn’t fully match what I saw on a single run. Worth watching your own usage counter if you use it heavily.
Magic Edit — Swapping One Element With a Prompt
Magic Edit gives you three scopes to work with: All, Area, or Element. I picked Element and pointed it at the laptop mockup inside my “Canva Explained” featured image.
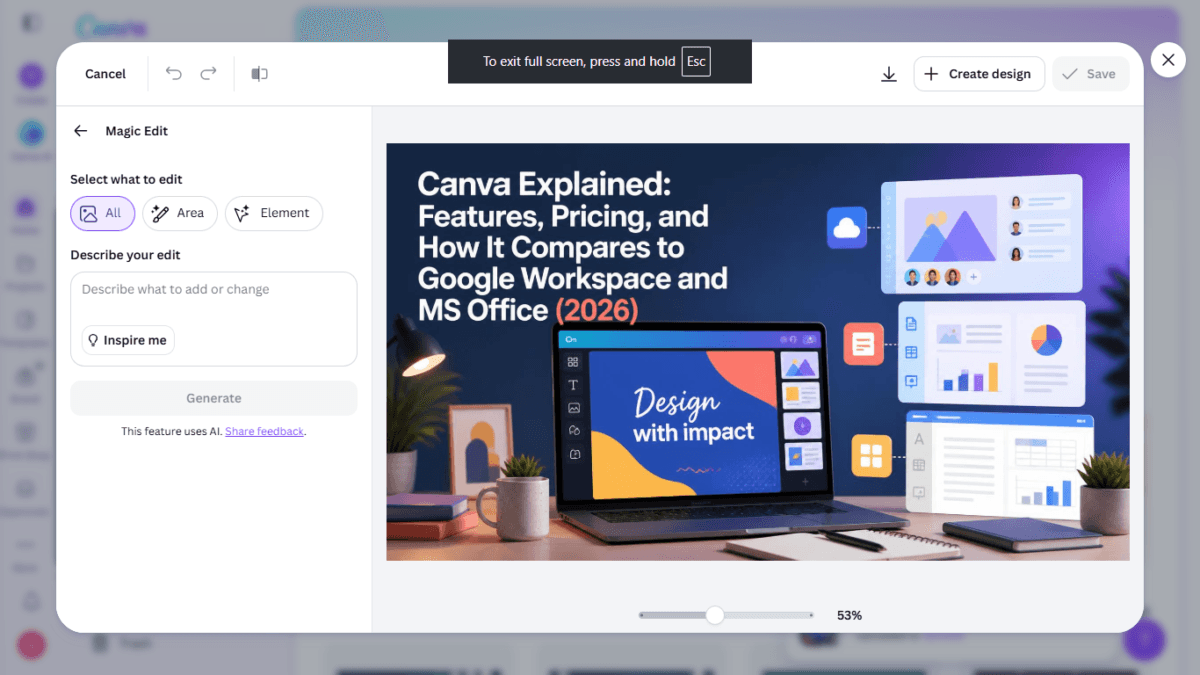
SCREENSHOT: the Magic Edit panel with All/Area/Element options and the prompt box, before scanningSelecting Element mode triggers a quick auto-scan — about 2 seconds — and Canva highlights the object it thinks you mean, in this case the laptop, outlined and ready to edit.
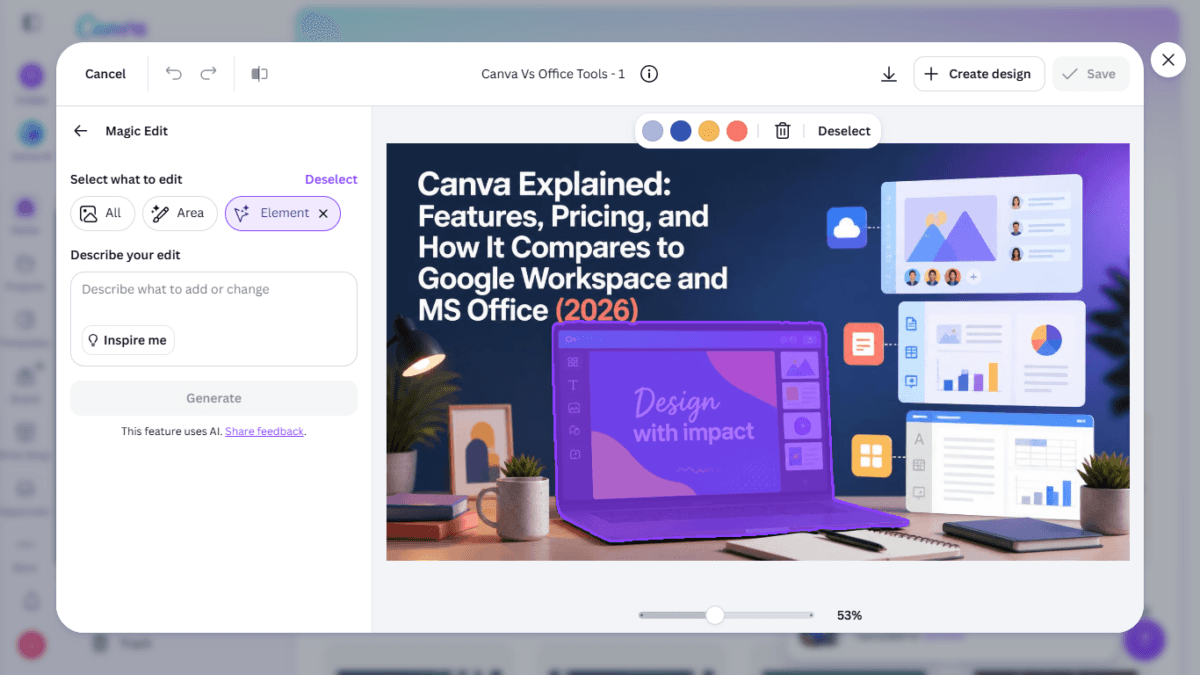
SCREENSHOT:the laptop auto-detected and highlighted in purple after Element mode scanI typed a simple prompt: “replace this element to led tv.”
Generation took 1 to 2 seconds. The laptop became a wall-mounted LED TV on a stand, and — this is the part that impressed me — the “Design with impact” graphic that was on the laptop screen got carried over correctly onto the new TV screen. Everything else in the image (the desk lamp, coffee mug, plants, notebook, the floating UI panels) stayed completely untouched.
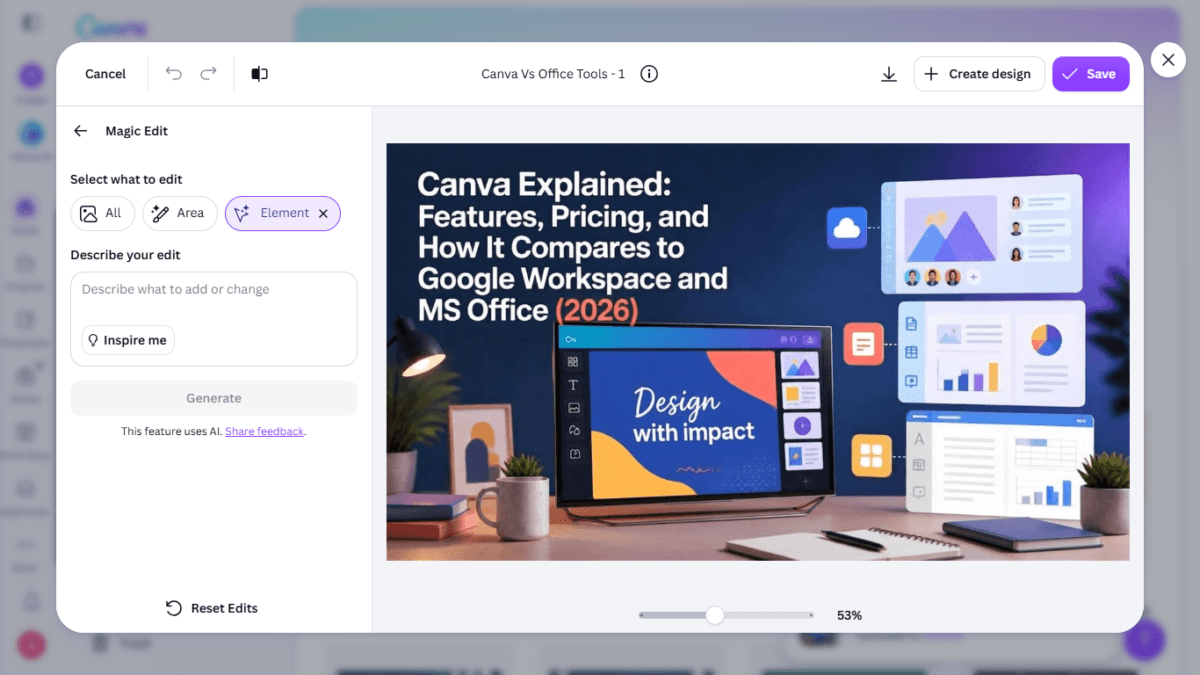
SCREENSHOT: the final result, laptop replaced with an LED TV, rest of scene untouched — best as a before/after side-by-side with the previous screenshotMy take: this is the tool I’d reach for first if a client wants “just change this one thing” in a graphic. Fast, accurate, and it didn’t disturb anything around the edited object.
Magic Eraser — Manually Removing Objects
Magic Eraser also gives you three modes — Area, Element, or Foreground — plus an Auto-detect toggle and an adjustable brush size (default 40px). I used Area mode and manually brushed over three different things in one pass: part of a headline (“How It Compares to”), a small cloud icon, and a coffee mug sitting on the desk.
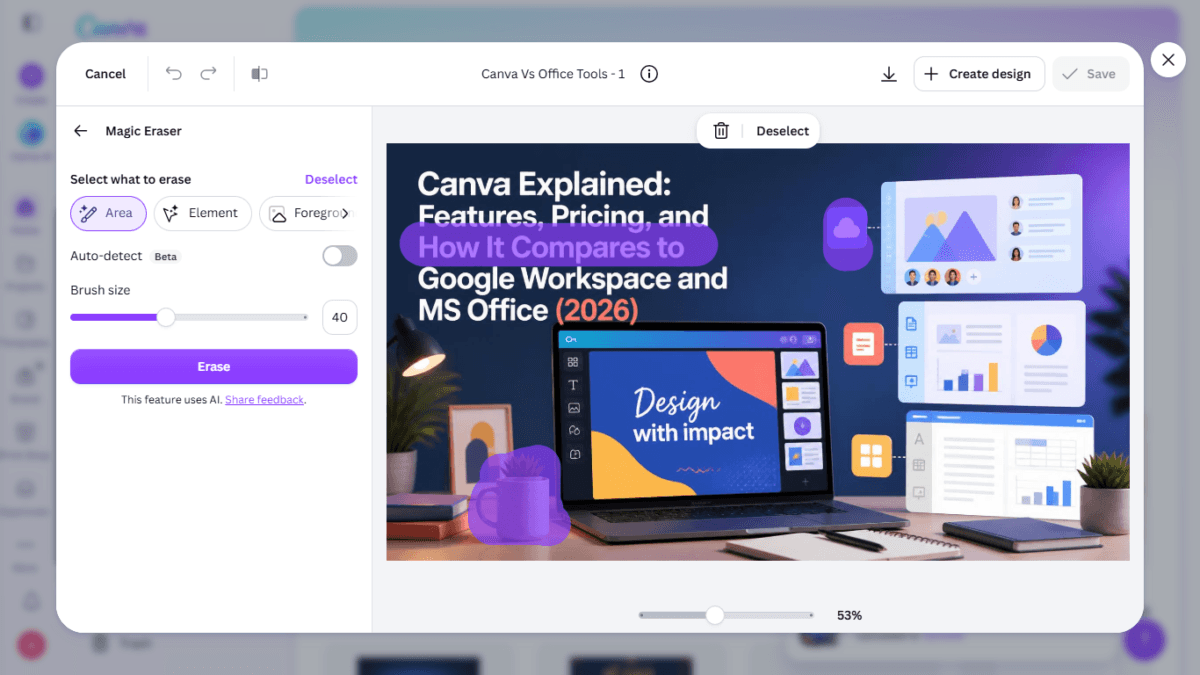
SCREENSHOT: the brushed-over area highlighted in purple, showing the headline text, cloud icon, and mug selected for removalOne click on Erase and all three were gone — the text lines above and below closed the gap naturally, and the desk surface where the mug had been filled in convincingly, with no smudging or leftover outline.
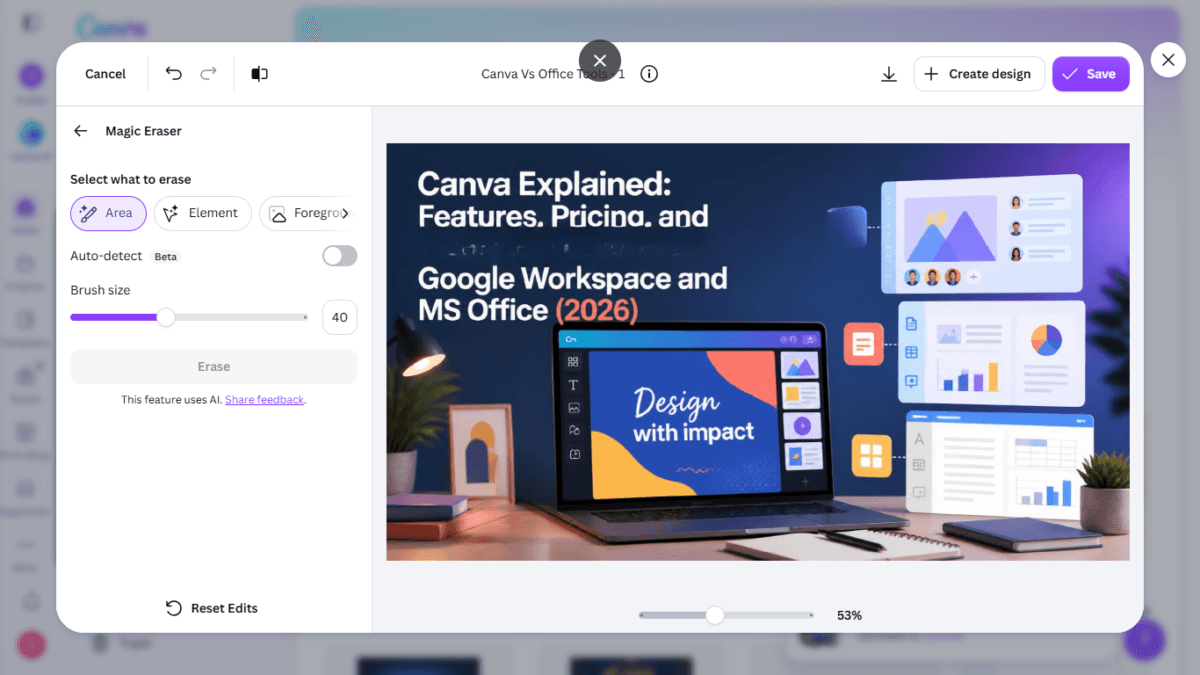
SCREENSHOT:the after result, showing all three elements cleanly removed — pair with the previous screenshot as a before/afterMy take: the manual brush mode is more work than Element’s one-click auto-detect, but it’s also more flexible — useful when you want to erase multiple unrelated things (like I did) rather than one clearly-defined object.
Magic Expand — Extending a Photo’s Canvas
Magic Expand lives under the Crop tool’s “Expand” tab. It only works inside a design — if you try it on a standalone uploaded image, Canva prompts you to “Open as design?” first and carries the image over.

SCREENSHOT:the "Open as design?" promptI picked the Whole Page size option on my Canva Explained desk photo.
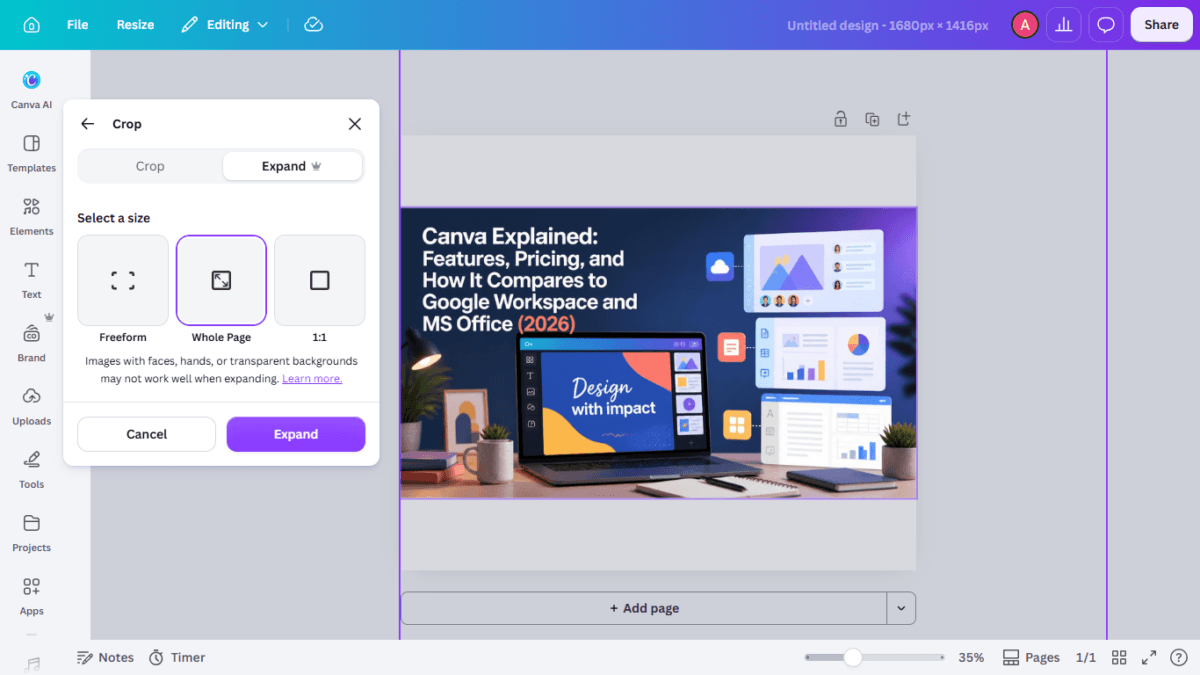
SCREENSHOT:the Crop/Expand panel with Freeform, Whole Page, and 1:1 options, Whole Page selected, showing the original unexpanded photoCanva generated four different expanded variations at once, all extending the canvas downward from the original photo. The one I picked added a matching dark blue wooden desk surface with drawer handles below the original shot, plus a textured wall section above — the lighting and shadow direction on the new material matched the original photo, which is the part that’s genuinely hard to fake convincingly.
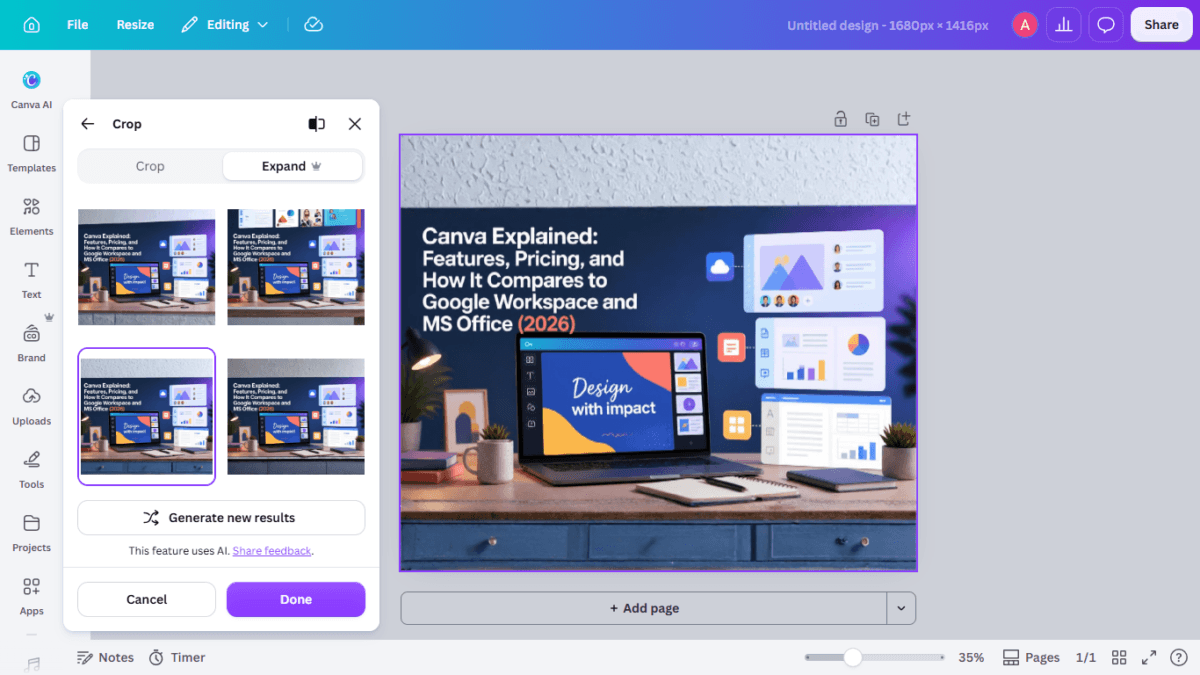
SCREENSHOT:the four generated variations plus the selected final result showing the expanded desk-drawer surface — this is the strongest visual in the whole article, worth using as the featured image
My take: the best result of the whole test. Extending a real photograph believably — not just stretching color — is a harder problem than most of the other tools here, and it held up.
Magic Grab — Pulling Out a Single Element
Magic Grab is easy to confuse with Magic Eraser or Magic Edit’s Element mode, but it does something different: it lets you isolate a specific element, subject, or part of a photo — foreground or background — and turn it into its own fully independent, editable Canva object, complete with its own toolbar. I tested it on a single object, but Canva’s own description covers isolating elements more broadly than that.
I selected the coffee mug (same three-mode setup: Area, Element, Foreground), the scan took about 3 seconds.
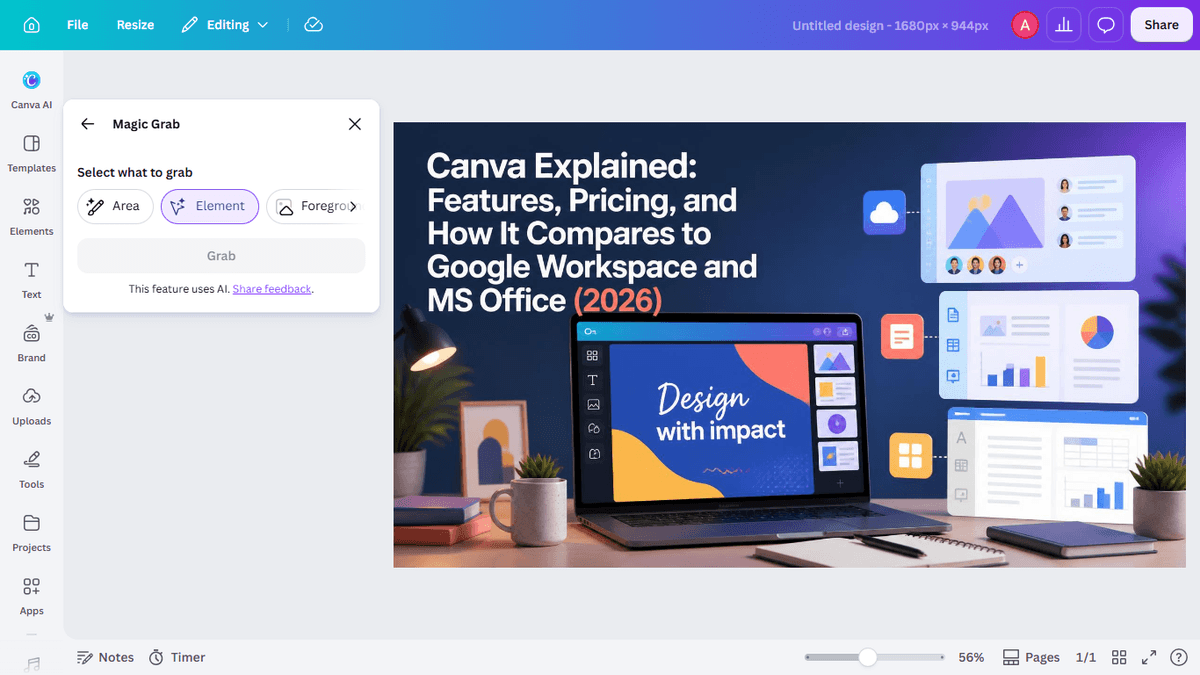
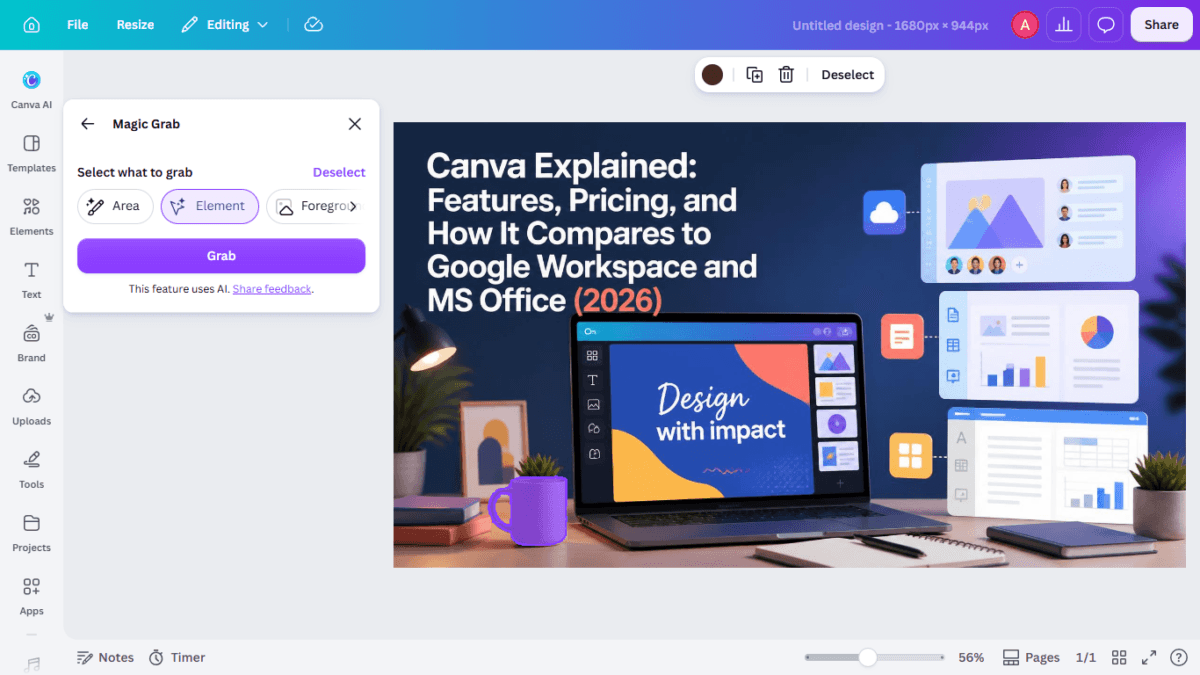
SCREENSHOT:the mug auto-detected and selected via Element modeThe result wasn’t just a cutout — the extracted mug came with its own Background Remover, Eraser, solid color swatches, Position, and Flip controls, as if it had always been a native Canva element rather than part of a flattened photo.
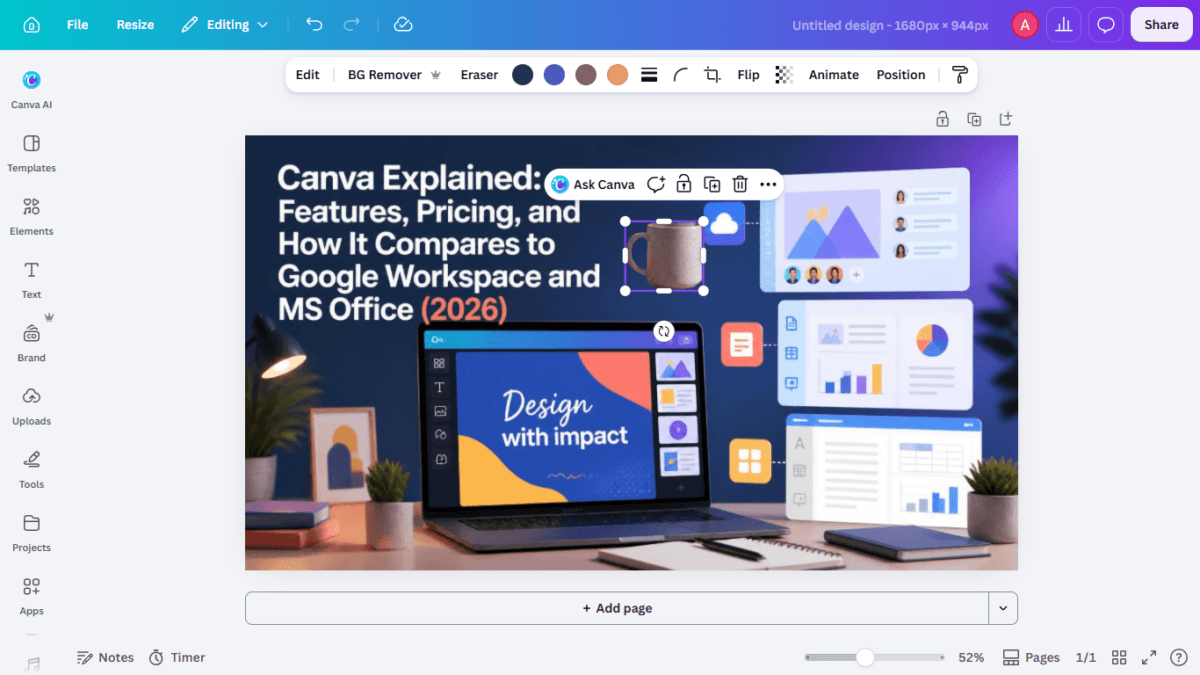
SCREENSHOT:the mug isolated as its own object with its full independent editing toolbar visible above itMy take: different use case from Layers — Layers un-flattens everything at once, Magic Grab targets one object you actually want to reuse elsewhere. If you just need to lift one thing out of a photo and turn it into its own asset, this is the faster tool.
Background Remover
The most straightforward tool in the set. One click on my Canva Explained desk photo and the entire dark blue/purple gradient background disappeared instantly, leaving the laptop, mug, books, plant, and floating UI panels isolated on a transparent canvas — clean edges, no visible fringing around any of the objects.
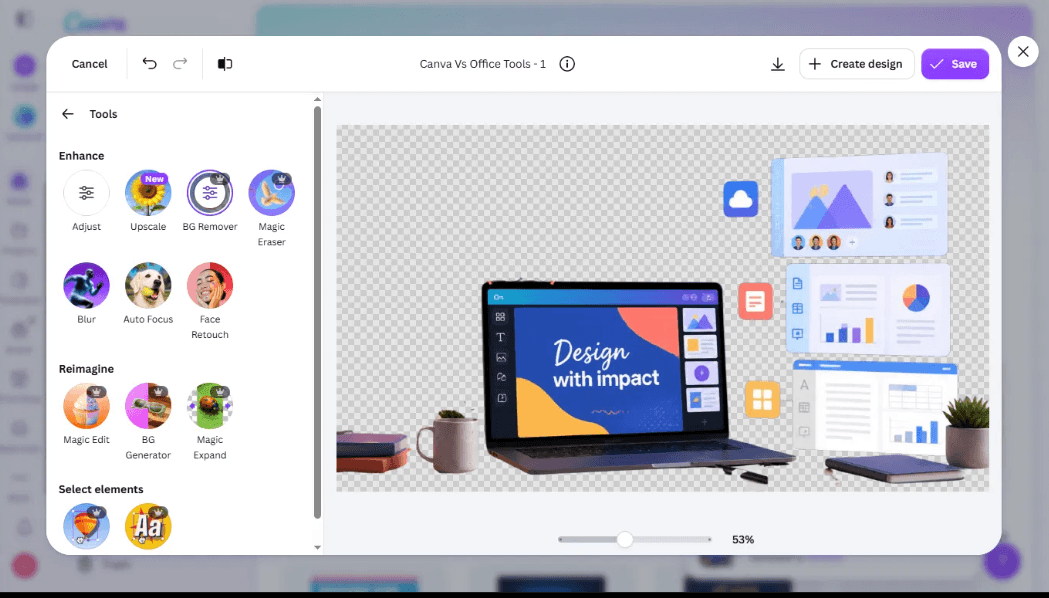
SCREENSHOT:the full Tools sidebar plus the result: background fully removed, transparent checkerboard canvas visible behind the isolated desk sceneMy take: does exactly what it says, no surprises, no wait time worth mentioning.
Background Generator
This is the natural next step after Background Remover — instead of just stripping the background, it replaces it with a new AI-generated one. You can type your own description, or hit Inspire me if you don’t have a specific scene in mind.
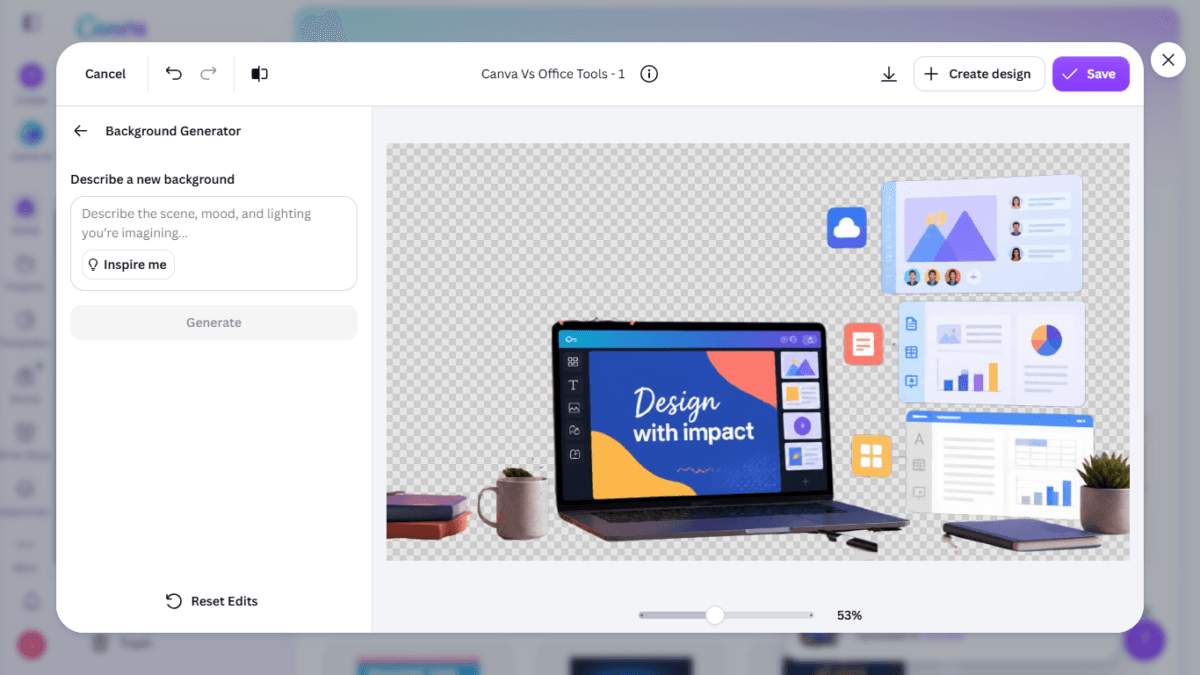
SCREENSHOT:the Background Generator panel with the empty prompt box and "Inspire me" button, on the transparent cutout imageI used Inspire me, and Canva picked its own prompt: “On a natural carpet rattan surface, bathed [in light].” It generated four variations, all placing the same desk scene on a woven rattan mat under soft natural window light, with realistic shadow patterns falling across the mug and laptop that matched the new light source — not just a background swapped in behind a flat cutout.
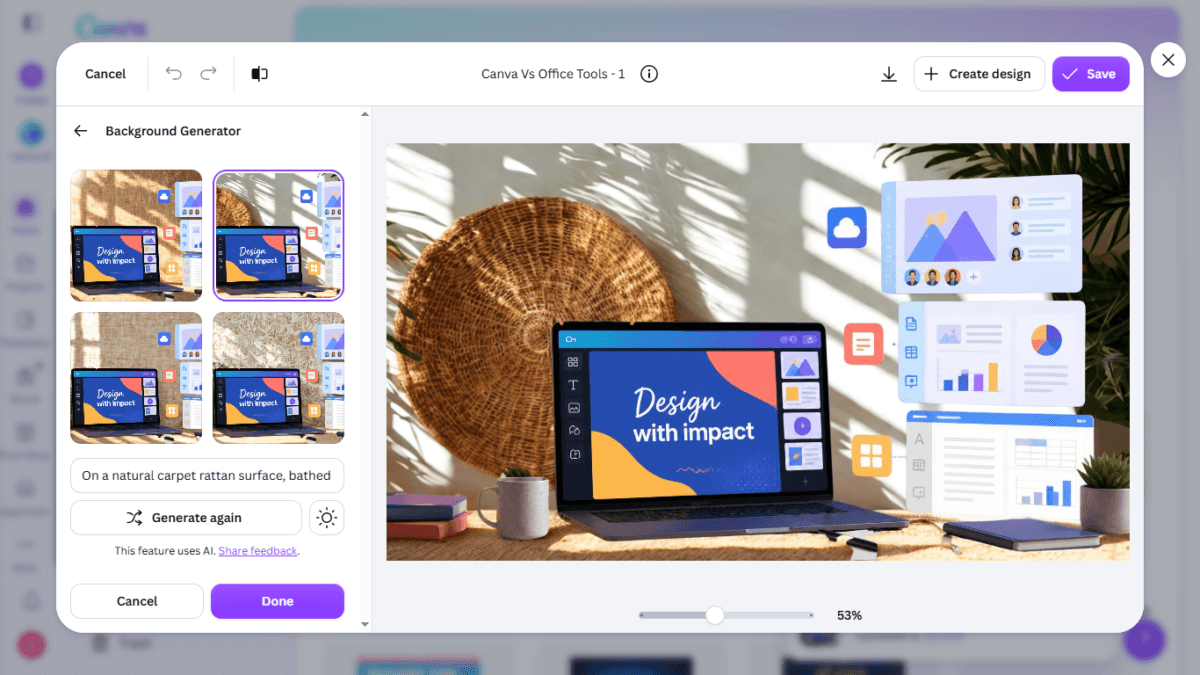
SCREENSHOT:the four generated rattan-surface variations plus the selected final resultMy take: the “Inspire me” option is genuinely handy if you know you want a new setting but can’t describe one — it did the creative work for me and the lighting consistency across the swap held up on close inspection.
Magic Media — Text-to-Image Generation
Found this one via the Apps sidebar search, under Images / Graphics / Videos / 3D tabs.
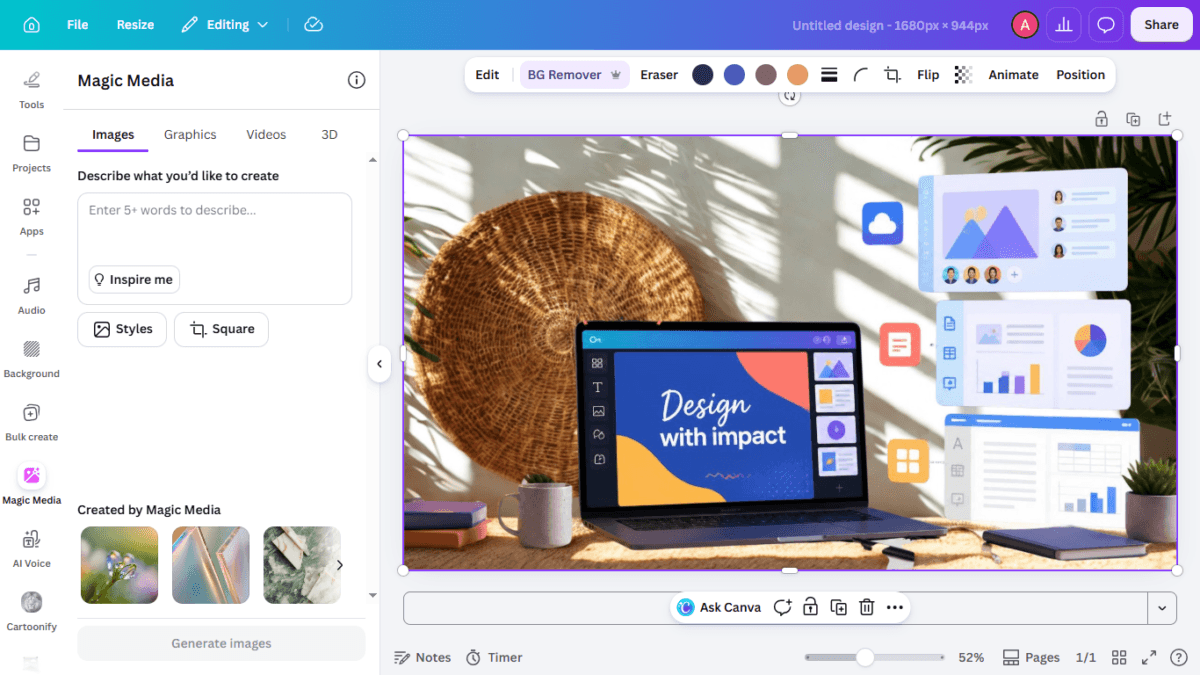
SCREENSHOT:the Magic Media panel, empty prompt box, and the "Created by Magic Media" history strip showing earlier generationsI kept the prompt deliberately minimal — just “A cat” — to see how it handled almost no direction. It returned four variations: two adult-cat close-ups and two kitten shots, in different compositions. Canva also shows a note that this feature is still evolving and lets you report images that don’t look right — a fair bit of transparency for an AI image tool.
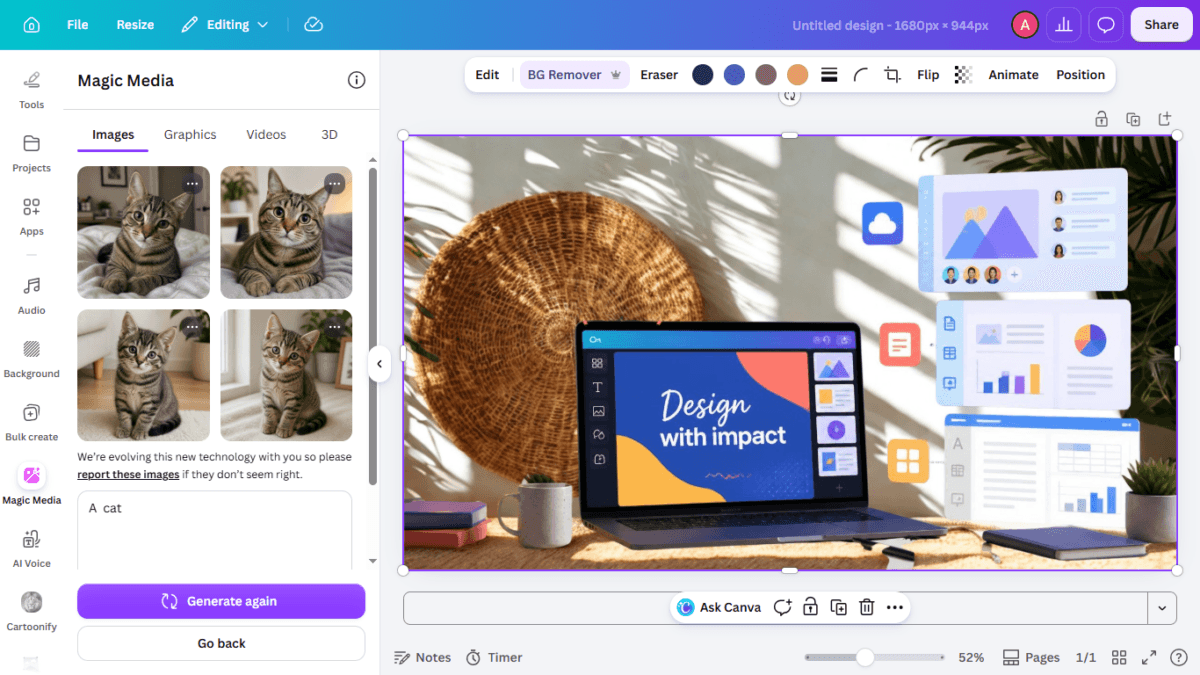
SCREENSHOT:the four generated cat/kitten images with the "A cat" prompt and evolving-tech disclaimer visibleMy take: it’s fine for what it is, but I wouldn’t call it a proper photorealistic image generator — it’s closer to a simple element-generation tool for filling a gap in a design, not something you’d rely on for a finished, publish-ready photo. On a basic prompt like mine it held up, but don’t expect Midjourney or DALL-E-level output or fine control over composition and detail. Treat it as a quick way to generate a placeholder or a supporting graphic, not your main image source.
How Much AI Allowance Did All This Actually Use?
This is the number most Canva pricing articles — including some of my own past assumptions — end up guessing at. So I checked my Billing page before and after this entire session.
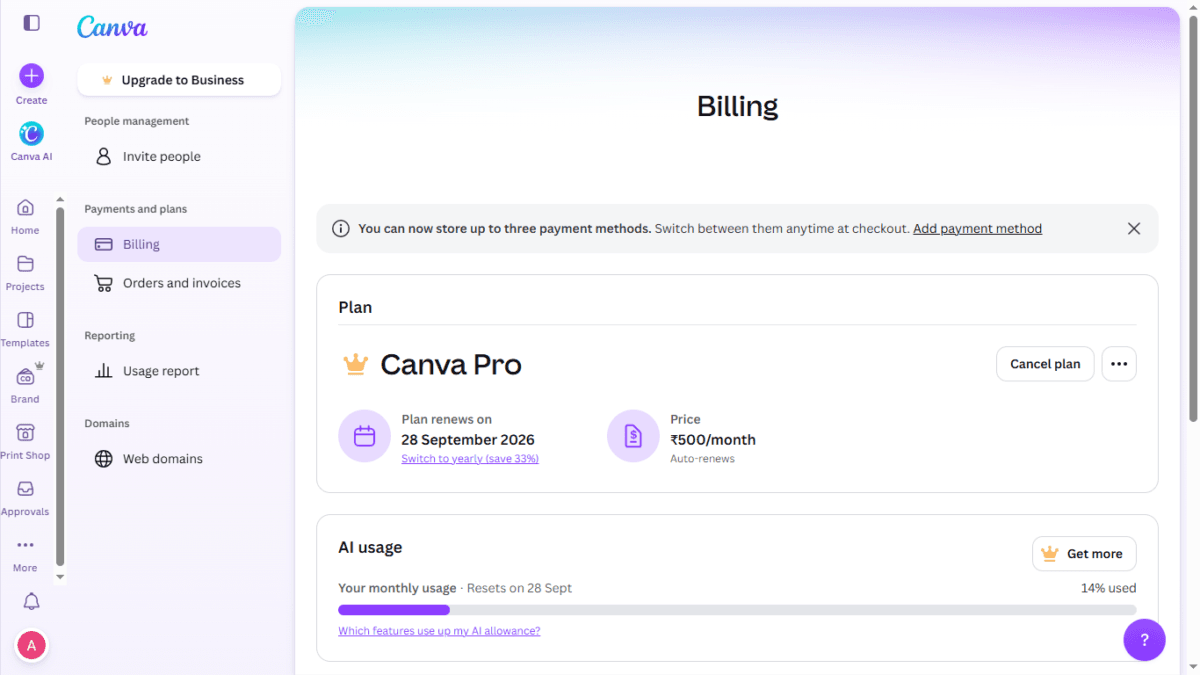
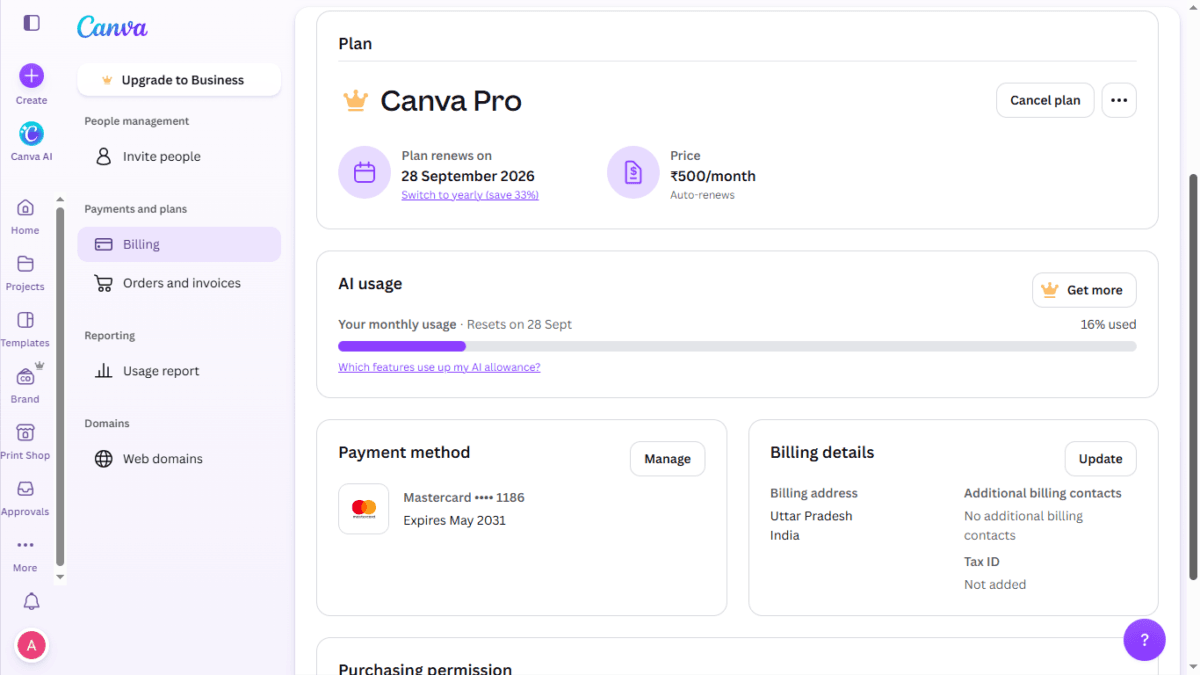
SCREENSHOT: Canva AI usage Before and after — side by side, showing the Billing page AI usage bar at 14% before testing and 16% after
| AI Usage | |
|---|---|
| Before testing | 14% of monthly allowance |
| After all 8 tools tested | 16% of monthly allowance |
That’s a 2 percentage-point increase in my account’s usage indicator across Magic Layers, Magic Edit, Magic Eraser, Magic Expand, Magic Grab, Background Remover, Background Generator, and Magic Media — several of which I generated multiple times over. To be clear about what this does and doesn’t show: this is what happened on my specific Canva Pro account during this specific session, not a general rate you should expect per tool or per generation — actual cost varies by tool, prompt complexity, and Canva’s own pooled-allowance math. But as a real, first-hand data point rather than a guess, it’s more than most Canva pricing articles offer.
That lines up with what I found when I broke down how Canva’s AI allowance actually works — Standard-tier tools are meant to cost nothing on a paid plan, though as the Magic Layers section above shows, don’t assume which tier a given tool sits in just from watching your own counter.
Which Ones Are Actually Worth Using {#verdict}
After running all eight back-to-back, here’s where I landed:
Reach for first: Magic Expand and Magic Edit. Both produced results I could publish without touching up afterward, and both solve real, specific problems — resizing a photo without losing the subject, and swapping one element without redoing the whole graphic.
Genuinely useful, more niche: Magic Layers (only matters if you’ve lost your original design file), Magic Grab (best when you need to lift one object out to reuse elsewhere), and Background Generator (best when Background Remover alone leaves you needing a replacement, not just a transparent cutout).
Solid, no-fuss utilities: Background Remover and Magic Eraser both do exactly what they promise, instantly, without much to say beyond that.
Fun, not mission-critical: Magic Media is the one I’d use least for actual TechMitra work. It’s less a full image generator and more a simple element-generation tool — fine for quick placeholders or supporting graphics, but it doesn’t compete with dedicated photorealistic generators, and for article featured images I still prefer designing around real screenshots and photos rather than AI-generated ones, in line with how I approach editorial standards on this site.
If you’re deciding whether Canva Pro is worth it partly because of Magic Studio, my honest answer hasn’t changed much from my Canva pricing breakdown: the AI tools are a genuine time-saver on top of the design editor, not a reason to subscribe on their own — but if you’re already paying for Pro, there’s no good reason not to be using most of these regularly.
This test only covered the image-editing side of Magic Studio. Tools like Magic Design, Magic Write, Magic Switch, Magic Morph, and Magic Animate work completely differently and deserve their own separate testing rather than a rushed mention here — something I’ll cover in a follow-up.
A Word on Privacy — These Tools Aren’t Just for Your Own Images
Something worth calling out plainly: every canva AI photo editing tool in this test happily works on any image you upload, not just ones you created or own the rights to. That’s convenient, but it’s also where the real risk sits.
Magic Layers and Magic Grab are the two I’d flag hardest. Both are built specifically to break apart a finished, flattened image — someone’s photo, poster, or screenshot — back into its individual pieces or lift a single object out of it. I tested this on my own banner, but nothing in Canva stops you from feeding it someone else’s photograph, a person’s face lifted from a social media post, or a copyrighted graphic, and pulling out exactly the piece you want. That’s a meaningfully different capability from a plain background remover, and it’s worth being deliberate about only using it on images you actually have rights to.
Magic Edit’s Element mode raises a related concern in a different direction — swapping one element for something else with a text prompt is exactly the kind of manipulation that makes deepfakes and doctored images easy to produce. My laptop-to-TV swap was harmless, but the same mechanism works on a face, a document, a product photo, or anything else someone might want to convincingly alter without leaving obvious signs of editing.
None of this means the tools are dangerous by design — Canva applies moderation and there are clearly legitimate uses for all of it, which is most of what this article covers. But if you’re a business owner, marketer, or anyone publishing edited images publicly, it’s worth being upfront with yourself (and your audience, where relevant) about what’s original and what’s AI-edited, particularly for anything involving real people who haven’t consented to being edited. Canva’s own AI terms make clear that you’re responsible for having the rights, licences, and permissions for whatever you upload and edit. There may also be legal consequences when manipulated images involve real people, privacy, impersonation, defamation, or other misuse — so Canva’s ability to make an edit doesn’t automatically make that edit appropriate to publish. I’m not a lawyer, and I’d treat this as a reason for caution rather than a legal opinion.
Does Canva mark AI-generated images so people can tell later? To some extent. Canva’s AI terms reference embedding content-provenance metadata (the C2PA / Content Credentials standard also used by tools like Adobe Firefly and OpenAI) to flag AI-generated or AI-edited content. In practice, this kind of metadata lives in the file container rather than the actual image pixels, which generally makes it fragile — screenshots, social re-uploads, and some format conversions are known to strip this type of metadata out. So treat it as a good-faith transparency signal rather than something you can rely on surviving once a file is downloaded, shared, or re-uploaded elsewhere. I’d suggest checking Canva’s current documentation directly if you need the specifics for a particular use case, since exact implementation details can change.
My practical rule for TechMitra: I only run these tools on images I created myself or have clear rights to use, I don’t use Element-swap style edits on anything showing a real, identifiable person without their knowledge, and where a featured image is AI-assisted rather than a straight photo, I try to be transparent about that rather than pass it off as an unedited photograph — since I can’t count on Canva’s own credentials to do that disclosure for me once the file is downloaded.
FAQ
Is Canva Magic Studio free to use?
Some Magic Studio tools are available on Canva’s Free plan with limited monthly AI uses; the full set, including Magic Expand, Magic Edit’s Element mode, and higher-tier tools, requires Canva Pro or above.
Does using Magic Studio tools cost extra on Canva Pro?
No separate charge — Magic Studio tools draw from your plan’s monthly AI usage allowance, which resets on your billing date. In my test, running eight different tools moved my own account’s usage indicator from 14% to 16% — actual cost per tool can vary based on the specific action and Canva’s pooled-allowance system.
What’s the difference between Magic Grab and Magic Layers?
Magic Layers splits an entire flattened image into all of its individual layers at once. Magic Grab lets you isolate a specific element or subject from a photo and turn it into a standalone, independently editable object.
Can Magic Expand work on any photo?
It works inside a design (Canva will offer to convert an uploaded image into one automatically), and generally handles background extension well; Canva itself notes that images with faces, hands, or transparent backgrounds may not expand as reliably.
Is it safe or legal to use Magic Layers or Magic Edit on someone else’s photo?
Technically the tools will work on any image you upload, but that doesn’t make it appropriate. Canva’s own AI terms require you to have the rights and permissions for whatever you upload and edit, and manipulated images involving real people can carry real consequences around privacy, impersonation, or defamation — so only use these on images you own or have clear rights to edit.
Does Canva add a watermark or label to AI-generated images?
Not a visible watermark. Canva’s AI terms reference embedding content-provenance metadata (the C2PA / Content Credentials standard) on AI-generated or AI-edited content, similar to what tools like Adobe Firefly and OpenAI use. This kind of metadata generally lives in the file container rather than the pixels, so it can be stripped by screenshots, re-uploads, or format conversions — it’s a transparency signal, not a guaranteed permanent label.
A final note: every image used in this test was one I created or personally own the rights to — nothing here was run on someone else’s photo, artwork, or copyrighted material. If you try any of these tools yourself, stick to the same rule: use them only on images you own or have clear permission to edit. It’s the difference between a genuinely useful editing tool and a shortcut for infringing on someone else’s work or misusing their likeness.

Ayush Singhal is the founder and chief editor of TechMitra.in — a tech hub dedicated to simplifying gadgets, AI tools, and smart innovations for everyday users. With over 15 years of business experience, a Bachelor of Computer Applications (BCA) degree, and 5 years of hands-on experience running an electronics retail shop, Ayush brings real-world gadget knowledge and a genuine passion for emerging technology.
At TechMitra, he covers everything from AI breakthroughs and gadget reviews to app guides, mobile tips, and digital how-tos. His goal is simple — to make tech easy, useful, and enjoyable for everyone. When he’s not testing the latest devices or exploring AI trends, Ayush spends his time crafting tutorials that help readers make smarter digital choices.
📍 Based in Lucknow, India
💡 Focus Areas: Tech News • AI Tools • Gadgets • Digital How-Tos
📧 Contact: Get in touch →
🔗 Full Bio: https://techmitra.in/about-us/