
I had a genuine reason to test this one — I needed a Janmashtami 2026 greeting banner for TechMitra’s social pages, in three sizes: an Instagram/Facebook square post, an Instagram Story, and a LinkedIn post. Normally that’s a Canva job for me: design once, resize three times, export three times.
This time I did the whole thing through Canva plugin for ChatGPT instead, staying in one chat from start to finish. I also ran a few extra tests afterward — background removal, text editing, and pulling a resume template — since those are things I actually use Canva for regularly.
Here’s exactly what happened, including where it worked cleanly and where it didn’t.
A quick disclosure on my setup: I tested this on ChatGPT Go (currently free until November 7, but normally a paid tier) paired with a paid Canva account. I haven’t verified whether the free ChatGPT tier has plugin access at all, or whether Canva’s free tier gives you the same feature set — Brand Kit access in particular is usually a Canva Pro feature regardless of what you’re paying ChatGPT. If you’re on free plans for either, treat what follows as what’s possible rather than a guarantee of what you’ll get.
(If you haven’t seen how ChatGPT plugins work in general, I covered the setup and permission flow in more detail in my Zomato and Spotify plugin test — the connection process for Canva follows the same pattern.)
Table of Contents
Also read : Canva Explained: Features, Pricing, and How It Compares to Google Workspace and MS Office (2026)
What Is the Canva Plugin in ChatGPT?
The Canva plugin is an official connection between ChatGPT and Canva — once linked, you can ask ChatGPT in plain language to generate, edit, resize, or export real Canva designs without opening canva.com separately. It shows up as @Canva inside a chat, and every design it touches is a genuine Canva file, not a flat image ChatGPT invented on its own.
Is that a real integration, or just image generation with extra steps? It’s real. Designs made through the plugin exist in your actual Canva account afterward — editable in Canva’s own interface, with your Brand Kit attached if you have one.
How to Connect Canva Plugin To ChatGPT
- In ChatGPT, click Plugins in the left sidebar.
- Search for “Canva,” or scroll down through the list until you find it.
- Click on Canva, then click Add to ChatGPT.
- Log in using the email ID your Canva account is registered with — you need an existing Canva account before connecting; ChatGPT doesn’t create one for you.
- Review and click Allow on the permissions screen to let ChatGPT access your Canva account. Once approved, the two are connected.
- In a new chat, click the + icon and select Canva to start using it — or just type
@Canvafollowed by what you want.
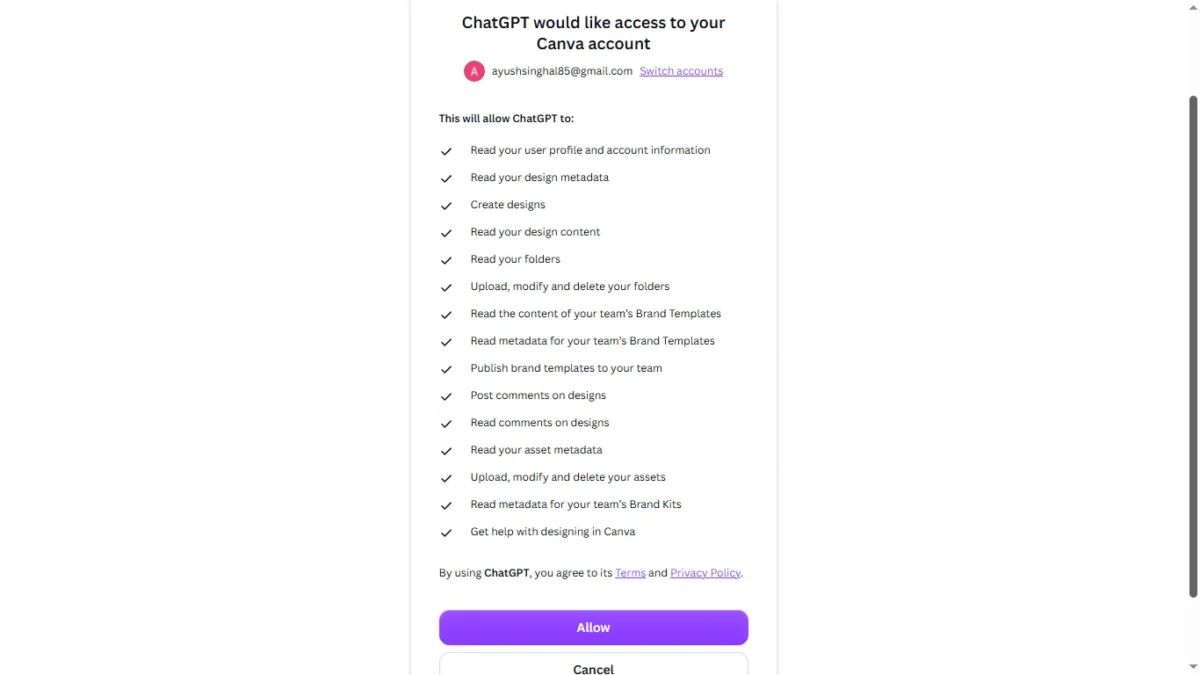
Step 5’s permission screen is worth reading closely — the access list is broader than “view your designs”:
- Read your design content, folders, and asset metadata
- Upload, modify, and delete your folders
- Upload, modify, and delete your assets
- Read and post comments on your designs
- Read your Brand Kit and Brand Templates
- Publish brand templates to your team
That’s write and delete access, not read-only — worth keeping in mind especially if you share a Canva workspace with a team.
(This isn’t my first look at ChatGPT’s app connections — I covered the mechanics of connecting a mailbox in Connect Hostinger Mailbox to ChatGPT, which is worth a look if you want the full walkthrough of OAuth-style permissions and login screens.)
What the Plugin Actually Is (And Isn’t)
Before testing, I assumed this plugin would work like ChatGPT’s built-in image generator — describe something, get a picture. It doesn’t. Canva’s own plugin description lists what it’s actually built for:
- Resize a design for different social platforms in one step
- Bulk-create designs from a spreadsheet (Canva Enterprise plan only)
- Edit existing designs — text, media, formatting, repositioning
- Get structured design feedback (visual hierarchy, readability, accessibility)
- Implement feedback left in comment threads
- Check a design against your Brand Kit
So this is a workflow tool for designs you already have, not a generator for designs you don’t. That distinction matters for what follows.
Test 1: Generating the First Draft
I gave it a full brief — deep blue and gold Janmashtami theme, peacock feather, diya, TechMitra logo, specific headline and subtext, no deity imagery.
“Prompt Used – Create a festive social media banner for TechMitra.in celebrating Krishna Janmashtami 2026 (September 4). Design specs:
Style: modern, minimal, on-brand with a tech publication (not a traditional festival card look)
Format: 1080×1080 (Instagram/Facebook square post)
Theme: Warm, festive Janmashtami colors — deep blues, gold/yellow accents, peacock feather motif (subtle, not overpowering)
Include: A small peacock feather or diya (lamp) illustration in one corner, TechMitra logo placement top-left or top-right
Main text: “Happy Janmashtami 2026” in a elegant, bold font
Subtext: “Wishing you joy, prosperity, and new beginnings — from Team TechMitra”
Keep it clean and professional — this is a tech brand’s festive greeting, not a full religious/devotional poster. Avoid deity imagery; use symbolic elements only (feather, diya, flute silhouette)
Leave breathing room/whitespace — don’t overcrowd the design”
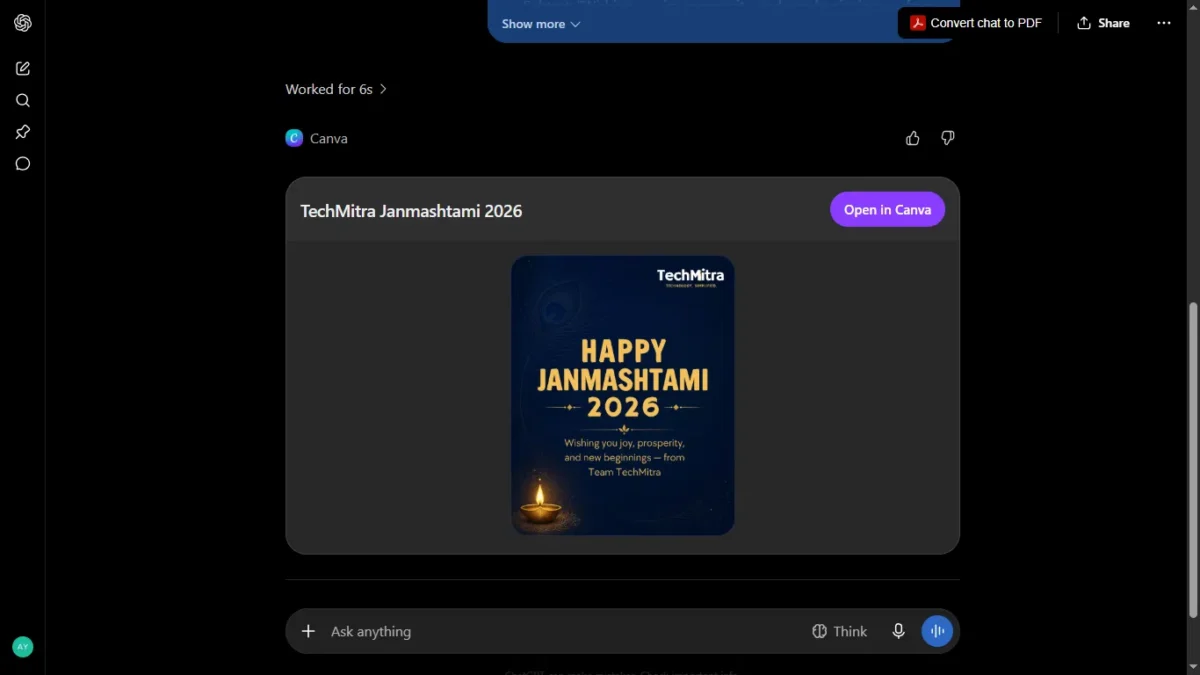
Using “Surprise me” as a starting template, the plugin picked a base design and applied my brief to it. The result was genuinely good on the first attempt — correct colors, a diya illustration, a peacock feather motif, the TechMitra logo placed correctly, clean readable text.
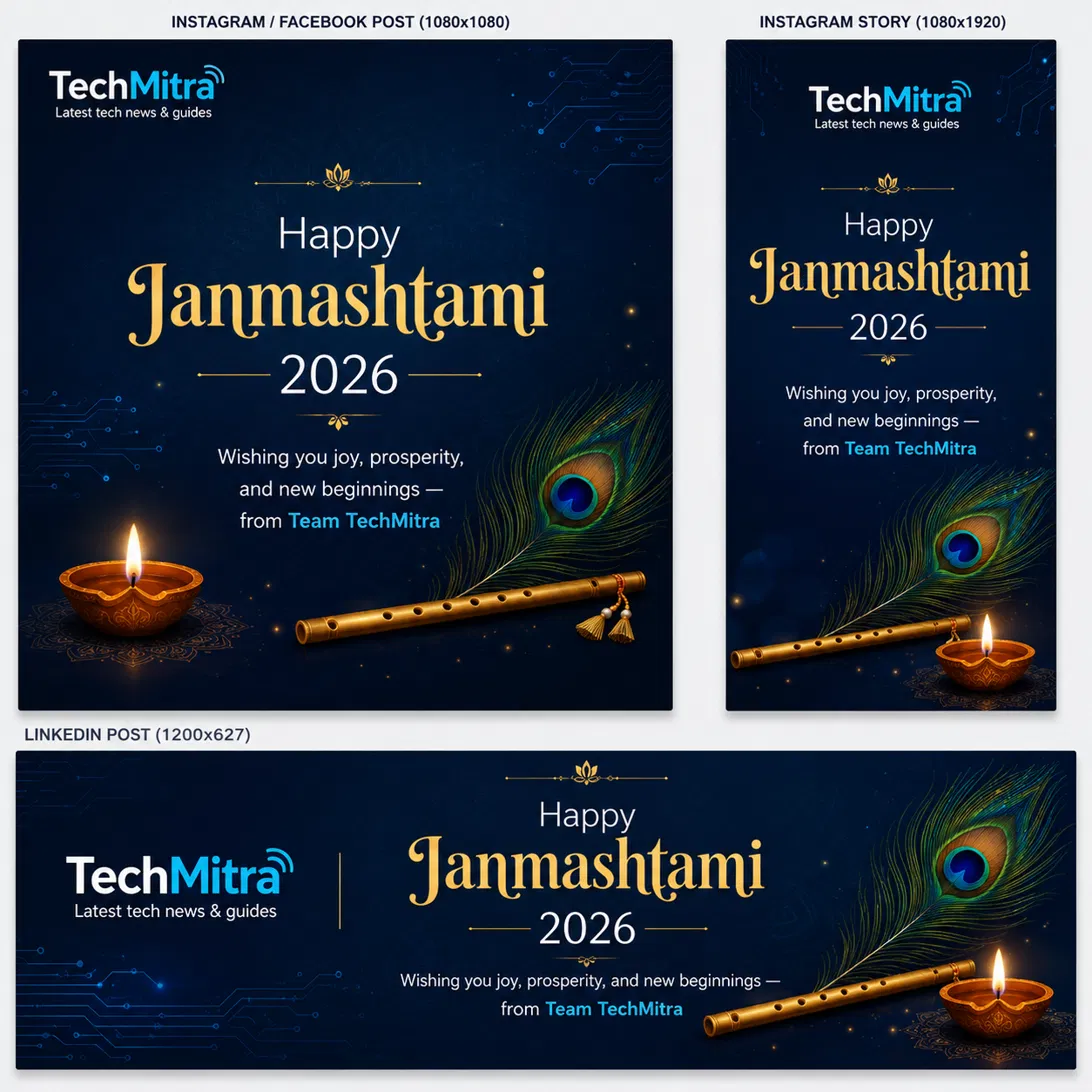
For comparison, I ran the same brief through ChatGPT’s native image generation instead of the plugin. That version was noticeably better composed — better balance between the peacock feather, flute, and diya, tighter typography, a subtle tech/circuit-board motif that tied it back to TechMitra’s brand without me asking for it.
First finding: for a first draft from a text prompt, native ChatGPT image generation beat the Canva plugin outright.
Test 2: Resizing for Multiple Platforms
This is the plugin’s headline feature, so I tested it directly — asked it to resize the design for Instagram Story and LinkedIn post, and to update the tagline text in the same prompt.
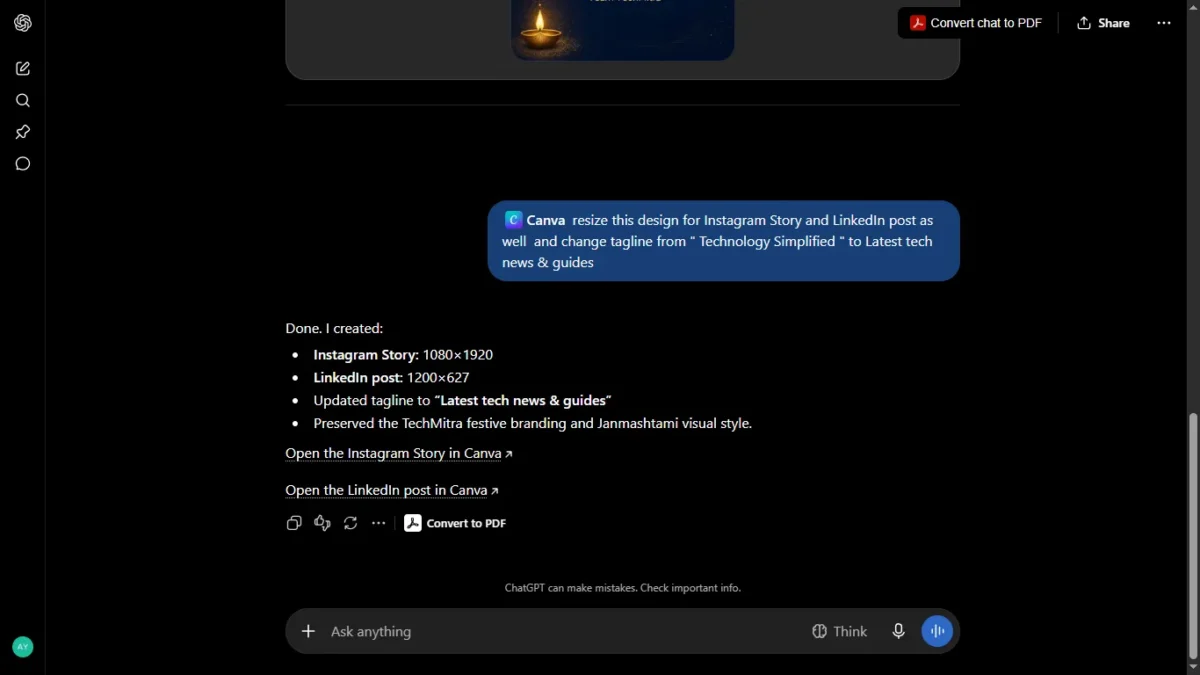
It executed both instructions and returned two Canva links at the correct dimensions: 1080×1920 for the Story, 1200×627 for LinkedIn. The tagline change was applied correctly on both.
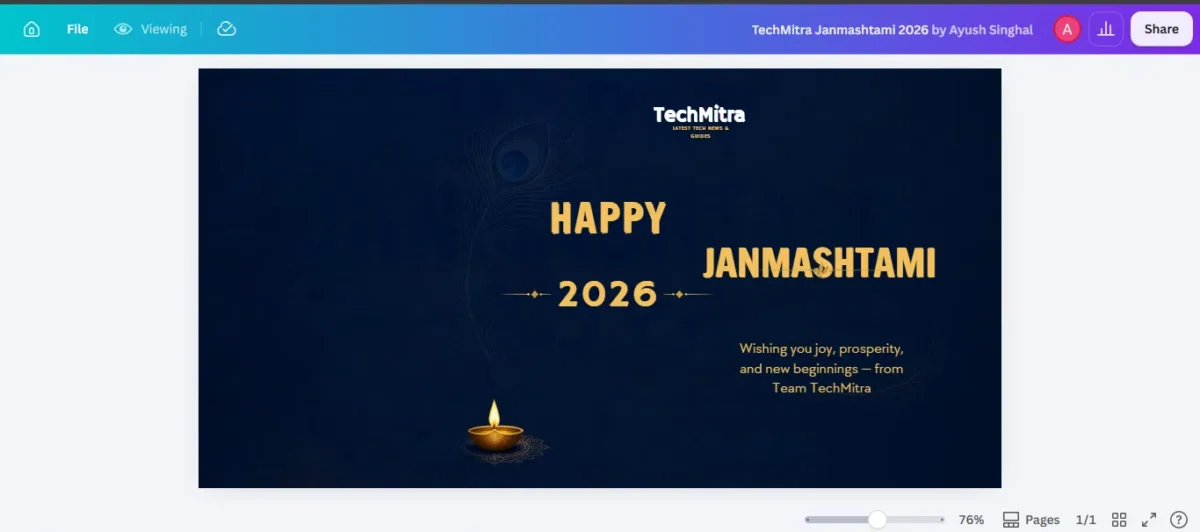
The problem was the layout. On both resized versions, “Happy,” “Janmashtami,” and “2026” — three separate text lines in the original square design — didn’t reflow properly for the new proportions. On the LinkedIn version they crowded into an awkward stack overlapping the decorative line. On the Instagram Story version, the words overlapped each other directly and were genuinely unreadable.
Second finding: the plugin gets the pixel dimensions right every time, but it does not reliably reflow text layout when the aspect ratio changes significantly. Don’t trust an auto-resize without opening the result and checking it yourself.
Test 3: Fixing the Broken Layout
Rather than resizing again, I gave it a precise, narrow instruction: fix only the headline positioning on the Instagram Story version, keep everything else untouched.
This worked well. The plugin asked for permission before making the change (a separate confirmation screen naming exactly what it was about to reposition), applied the fix, and then paused again — showing me a preview and asking me to confirm before saving. Once I confirmed, “Happy,” “Janmashtami,” and “2026” were cleanly separated, centered, and readable.
Third finding: narrow, specific edit instructions work reliably. Broad instructions (“resize this for all platforms”) are where it struggles.
Test 4: Splitting One Image Into Separate Files
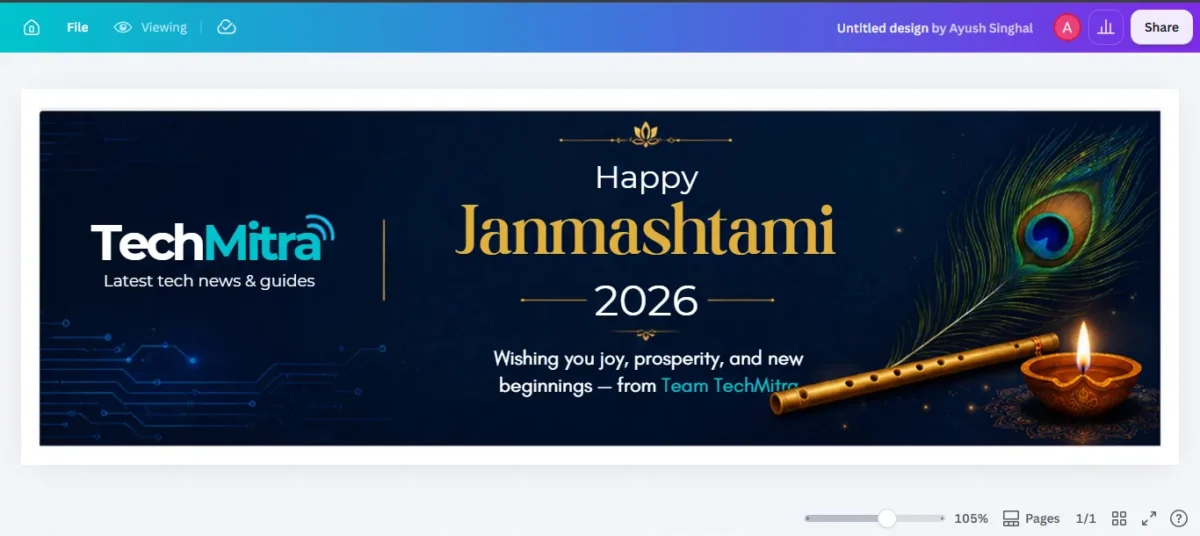
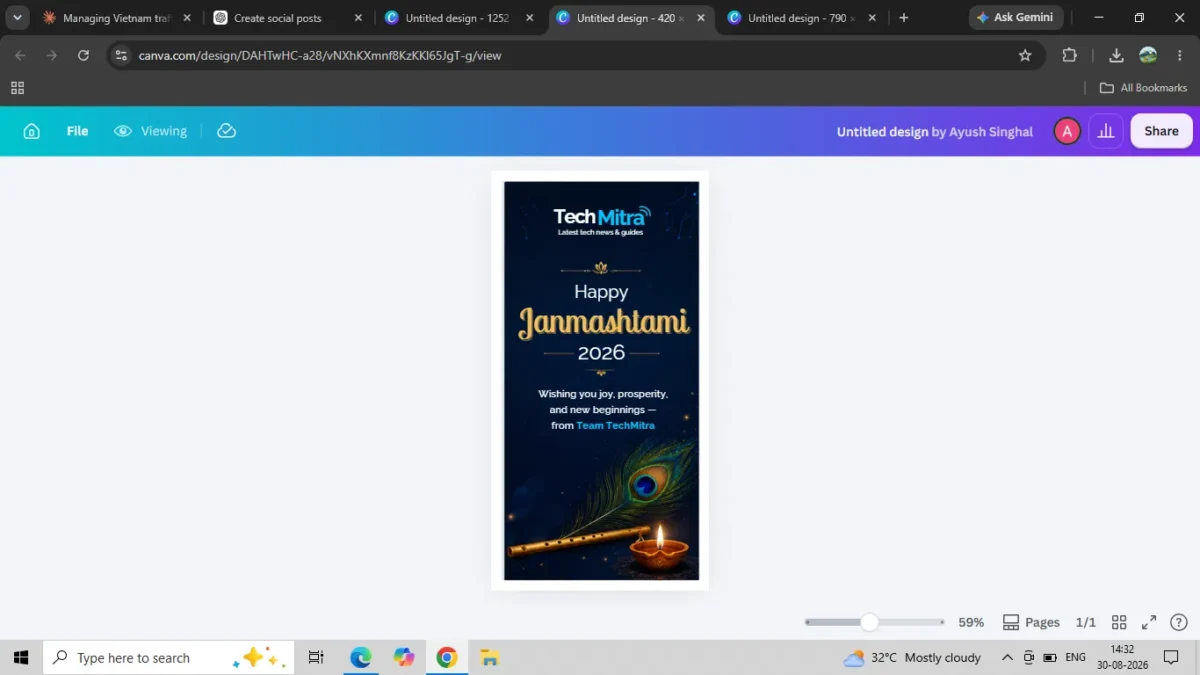
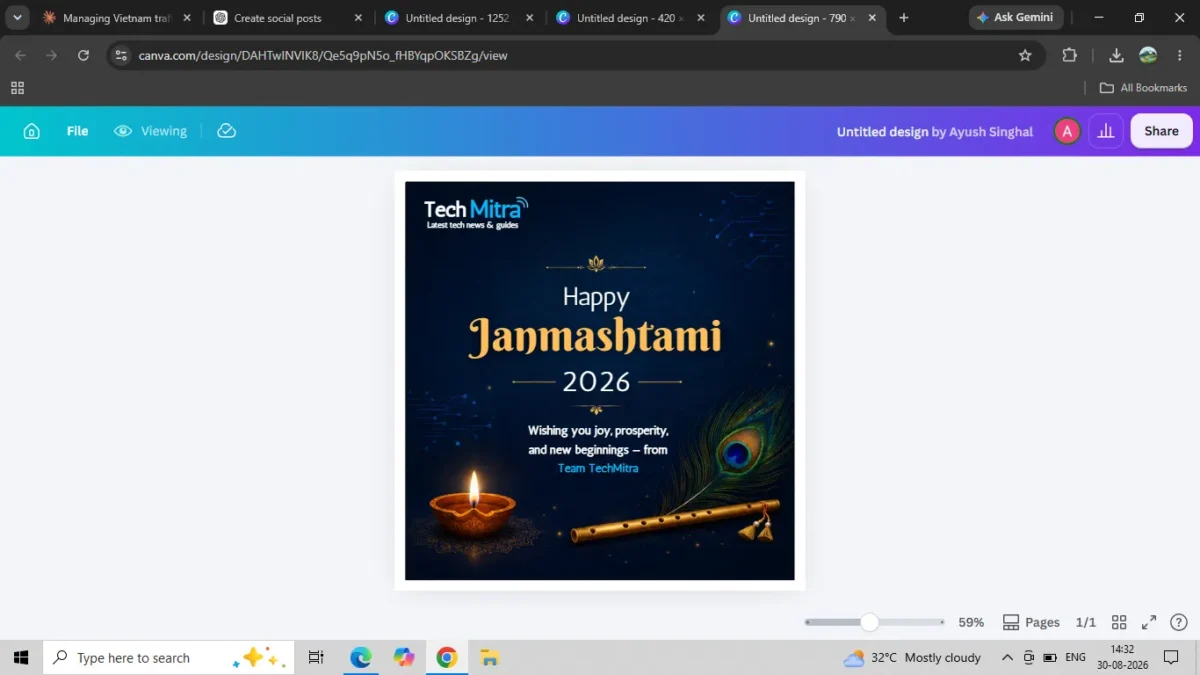
I had a single composite image — the three banner sizes shown side by side in one picture, generated by ChatGPT’s native image tool — and asked the Canva plugin to detach it into three separate files at the correct sizes.
This worked cleanly. It returned three distinct Canva project links, each a real, separately editable design at the exact right dimensions, with the size labels stripped out.
I then tried asking native ChatGPT image generation to do the same “split into 3 parts” task, without the plugin. It couldn’t — it just returned another single flat image showing all three panels together, not three separate files.
Fourth finding, and the most important one: this is the one thing native ChatGPT structurally cannot do. It only ever outputs flat images. If you need genuinely separate, individually downloadable, platform-correct files, the Canva plugin is the only one of the two that can produce them.
Test 5: A Precise Color Change
I asked it to change just the word “Janmashtami” from gold to red, across all three of the separated design files, in one prompt.
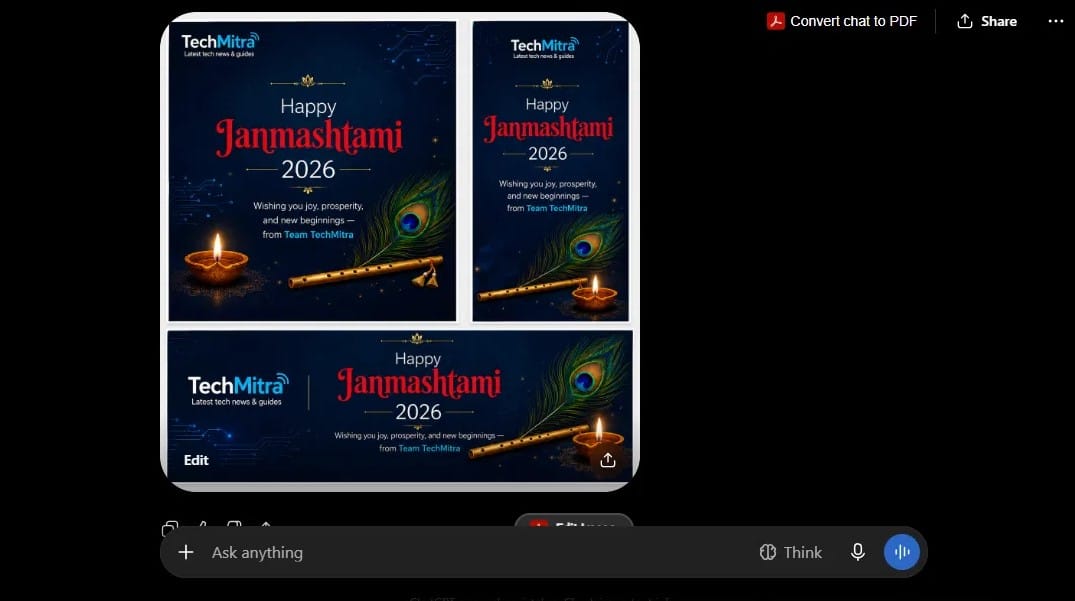
This was the cleanest result of the entire test. It correctly identified “Janmashtami” as a distinct element (separate from “Happy” and “2026”), recolored it consistently across all three files, and left everything else — the feather, the diya, the logo, the other text — untouched. It showed me a preview and asked for confirmation before saving, same as the layout fix.
I then ran the identical prompt through native ChatGPT image generation for comparison. The result was, honestly, the same — correct, consistent, no side effects. For this specific kind of edit, there was no real difference between the two.
Test 6: Background Removal and Text Editing
After a break, I came back and tested two more things I regularly use Canva for directly: removing a background from an image, and editing text on an existing design.
Neither worked properly, and I’m not going to soften that with vague language. Both attempts produced results I couldn’t use, and I ended up fixing both manually in Canva’s own editor.
Test 7: Fetching a Template
I also tried a completely different use case — asking it to pull up a resume template and build on it, since that’s a real workflow I use Canva for outside of social banners. This didn’t work either; it wasn’t able to fetch and populate an actual Canva resume template the way I can when I do it manually inside Canva.
Where Everything Ends Up
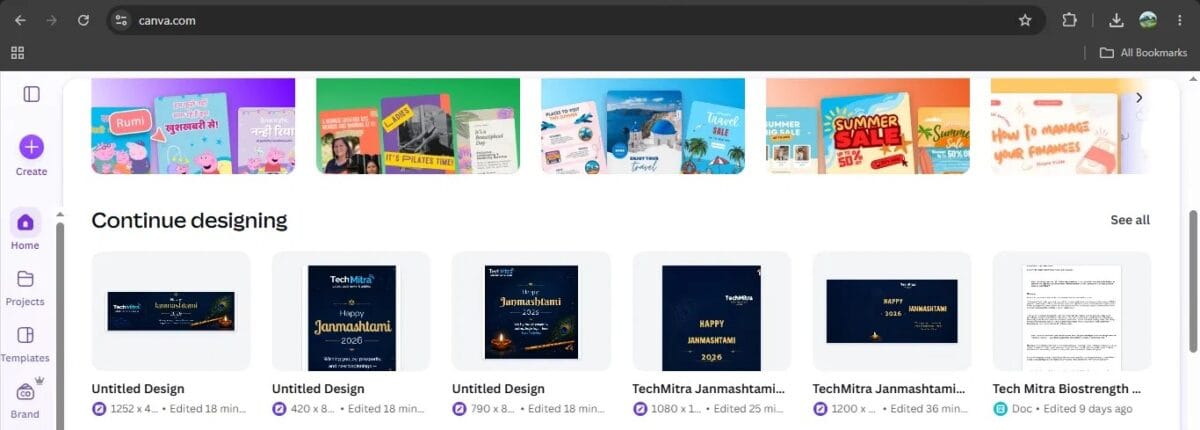
One practical thing worth knowing before you start: every design the plugin creates or touches shows up as a permanent, saved project in your actual Canva dashboard — not inside the ChatGPT conversation. You’ll end up with a dashboard full of “Untitled Design” entries unless you rename them as you go. The plugin removes the manual resize/edit labor, not Canva itself — you still finish the job in your Canva account.
See our complete Canva Pro Lite vs Pro vs Free comparison for a full breakdown of pricing and features.
The Verdict
Across seven tests, the pattern was consistent: the plugin is reliable for narrow, well-defined edits on designs it or Canva already has, and unreliable for anything that requires understanding layout, structure, or fetching existing templates.
What worked:
- Generating a first draft from a prompt (though native ChatGPT did this better)
- Splitting a composite image into separate, correctly-sized, editable Canva files — the one genuine advantage over native ChatGPT
- Precise, single-element edits (a specific color change, a specific text fix)
What didn’t:
- Automatic multi-platform resizing (broke text layout every time)
- Background removal
- Editing existing text on a design
- Fetching and populating an existing template (resume)
If your entire need is “design something and export it in three sizes,” I’d say do the design in native ChatGPT, then use the Canva plugin only for the one thing it’s actually good at: splitting that design into separate, correctly-sized real files. For anything more involved — background removal, template-based work, precise text editing on an existing design — I went back to opening Canva directly, and I’d suggest you do too.
FAQs
Is the Canva plugin for ChatGPT free?
Canva’s own plugin listing doesn’t require a paid Canva plan for design generation, editing, or resizing — only Bulk Create (spreadsheet-based mass generation) needs an eligible Canva Enterprise plan. I tested this on a paid Canva account myself, so I can’t personally confirm every feature behaves identically on Canva’s free tier — Brand Kit access, in particular, is usually gated to Canva Pro independent of ChatGPT.
How do I connect ChatGPT to Canva?
Click Plugins in ChatGPT’s left sidebar, find Canva, and click Add to ChatGPT. You’ll get an OAuth-style permission screen — read it before allowing, since the access list includes uploading, modifying, and deleting your Canva folders and assets, not just read access.
Does ChatGPT work with Canva, or is it just image generation?
It’s a genuine integration, not just image generation dressed up. Designs made through the plugin are real Canva files that live in your Canva dashboard afterward — editable in Canva’s own interface — which is different from ChatGPT’s native image generator, which only ever outputs flat images.
Can I use the Canva plugin without leaving ChatGPT?
You can trigger every action from inside ChatGPT, but the finished designs open and save inside your actual Canva dashboard — you’re not staying entirely inside the ChatGPT interface.
Is native ChatGPT image generation better than the Canva plugin?
For a first draft or a simple visual edit, often yes. The Canva plugin’s real advantage is producing separate, editable, correctly-sized files — something native ChatGPT image generation cannot do on its own.

Ayush Singhal is the founder and chief editor of TechMitra.in — a tech hub dedicated to simplifying gadgets, AI tools, and smart innovations for everyday users. With over 15 years of business experience, a Bachelor of Computer Applications (BCA) degree, and 5 years of hands-on experience running an electronics retail shop, Ayush brings real-world gadget knowledge and a genuine passion for emerging technology.
At TechMitra, he covers everything from AI breakthroughs and gadget reviews to app guides, mobile tips, and digital how-tos. His goal is simple — to make tech easy, useful, and enjoyable for everyone. When he’s not testing the latest devices or exploring AI trends, Ayush spends his time crafting tutorials that help readers make smarter digital choices.
📍 Based in Lucknow, India
💡 Focus Areas: Tech News • AI Tools • Gadgets • Digital How-Tos
📧 Contact: Get in touch →
🔗 Full Bio: https://techmitra.in/about-us/