

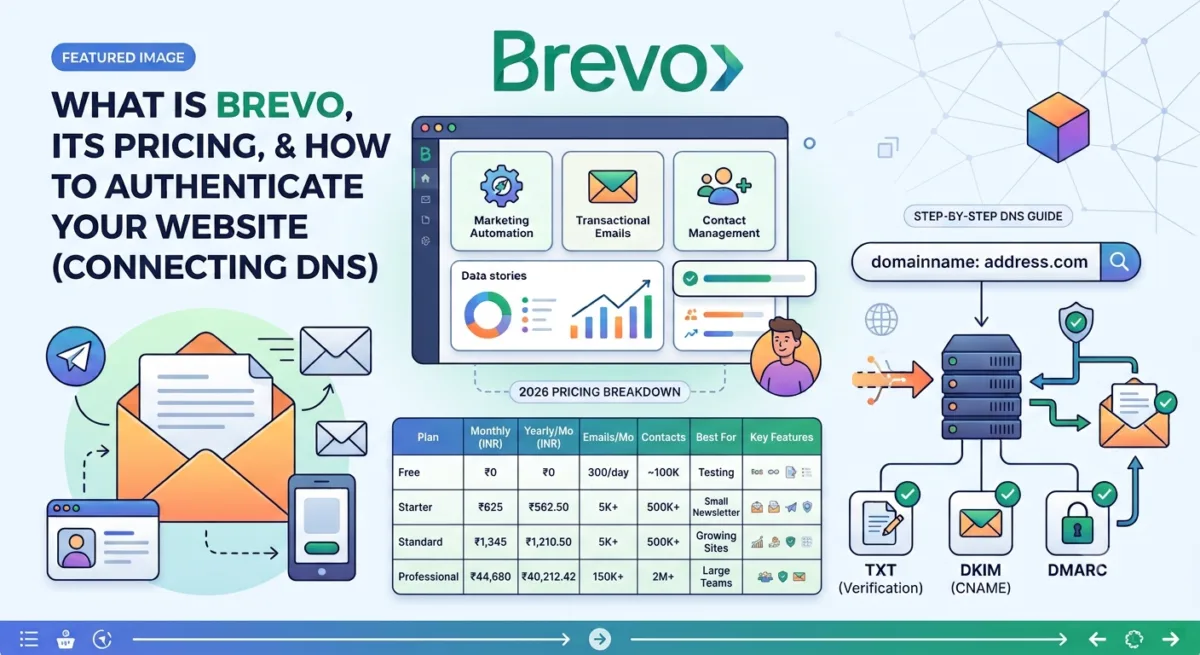
Brevo DNS Settings, Pricing, and Setup Guide
If you read our earlier guide on adding a Brevo contact form and newsletter to WordPress without any plugin, you already know how we use Brevo on TechMitra. This time, we’re going one level deeper — covering what Brevo actually is, its full pricing breakdown, and the DNS authentication step that trips up most first-time users: verifying your domain so Brevo will actually send emails on your behalf.
We tested this Brevo DNS settings hands-on across two setups — one domain on Cloudflare DNS and one on Hostinger’s DNS Zone Editor — so whichever you use, you’ll see the exact screens.
Table of Contents
Also Read : Top 10 Free and Best Email Services Indians Should Choose From (Hands-On Review)
What is Brevo?
Brevo (formerly Sendinblue) is an all-in-one marketing platform that handles email campaigns, transactional email/SMS, marketing automation, and — depending on the plan — sales CRM features like pipeline management and live chat. For WordPress site owners like us, its most practical use is sending contact-form notifications and newsletters reliably, without needing a separate SMTP plugin.
Brevo Pricing Plans (2026)
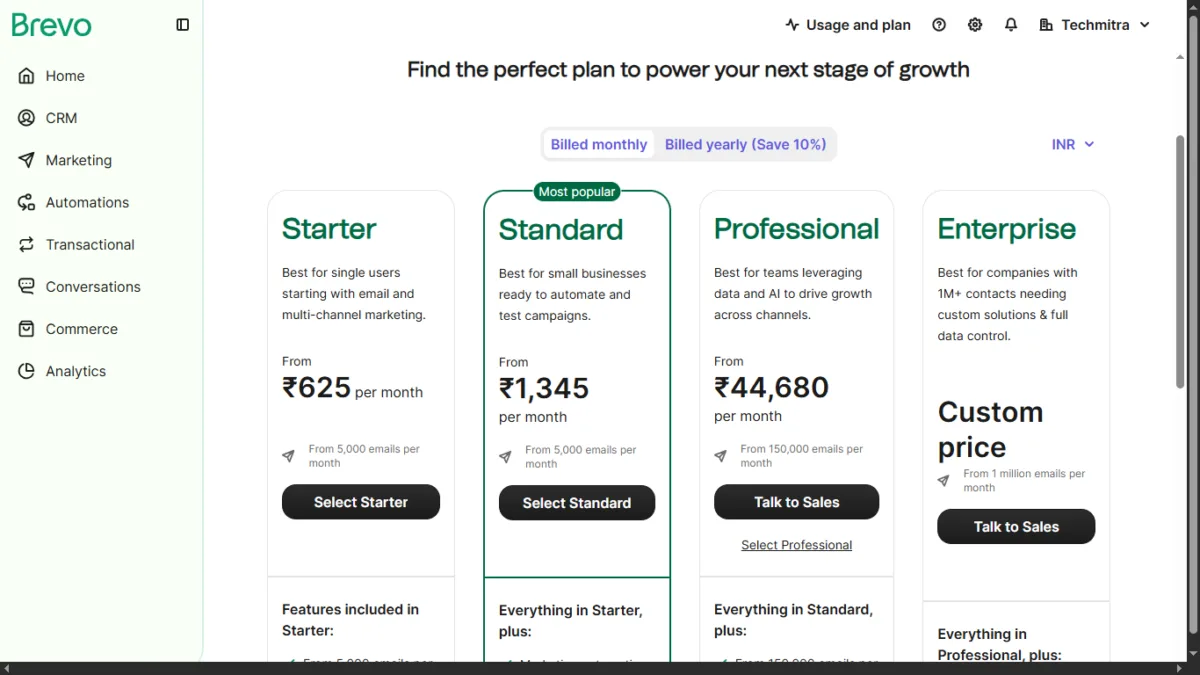
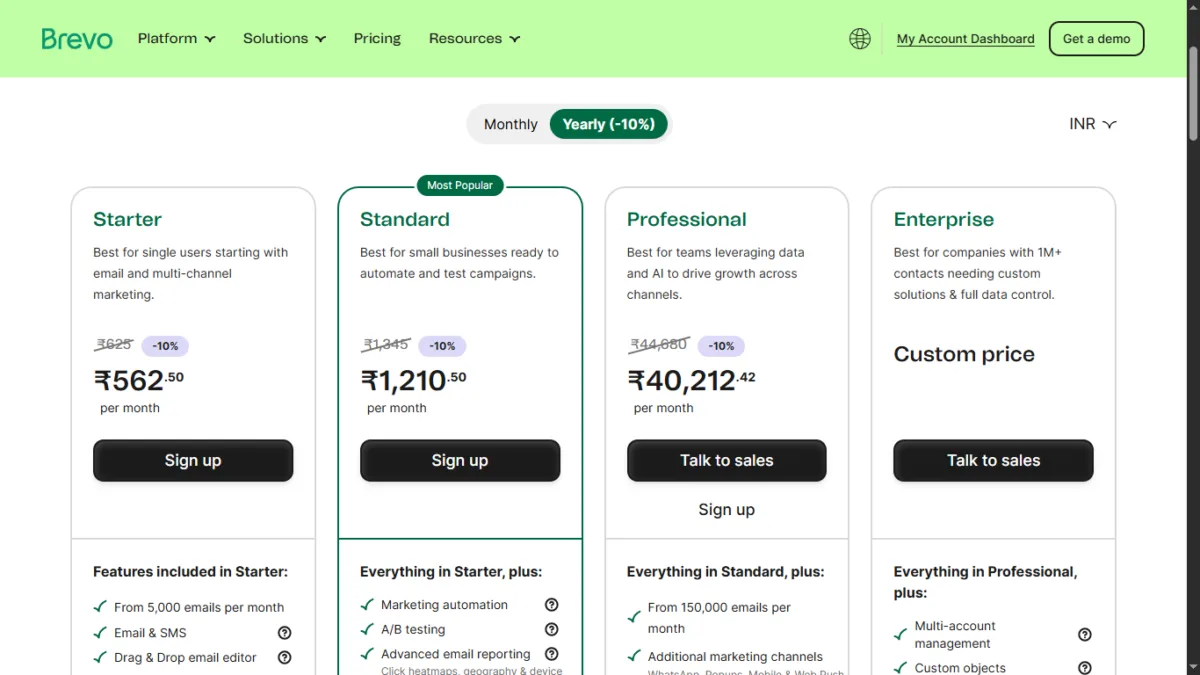
Brevo bills either monthly or yearly (yearly saves 10%). Here’s both, in INR:
| Plan | Monthly | Yearly/mo | Emails/mo | Contacts | Best for |
|---|---|---|---|---|---|
| Free | ₹0 | ₹0 | 300/day | Up to 100K | Testing |
| Starter | ₹625 | ₹562.50 | From 5,000 | Up to 500K | Small blogs |
| Standard | ₹1,345 | ₹1,210.50 | From 5,000 | Up to 500K | Growing sites |
| Professional | ₹44,680 | ₹40,212.42 | From 150,000 | Up to 2M | Large teams |
| Enterprise | Custom | Custom | From 1M | Unlimited | Large orgs |
Scroll horizontally to see all columns. Prices in INR, yearly billing includes a 10% discount.
There’s also a Sales suite (CRM/pipeline tools) bundled into the same checkout as an add-on — you’re not forced to buy it separately:
| Sales Plan | Price/month | Notes |
|---|---|---|
| Sales Free | ₹0 | Included by default — 50 open deals, 1 pipeline, live chat |
| Sales Essentials | ₹2,597 | Sales automation, AI contact enrichment, chatbot scenarios |
| Sales Advanced | ~₹4,755 | AI chatbot, VoIP phone, up to 50 users |
Two things the pricing page doesn’t make obvious until checkout:
- 18% IGST is added on top of every plan for Indian customers. On the Starter plan (₹625/month), that’s ₹112.50 extra — a total of ₹737.50/month. Budget for this; the sticker price isn’t the final price.
- Removing the Brevo logo from your emails costs extra — it’s a ₹750/month add-on on top of your plan, not included even on paid plans below Standard.
Our take: for a typical WordPress blog or small business site — contact forms, a newsletter, maybe RSS-based campaigns — the Free or Standard plan covers nearly everyone. There’s a steep jump from Standard to Professional (₹44,680/month), so unless you genuinely need analytics studio, phone support, or multi-user access, most readers will never need to cross that gap.
One distinction worth making: the Free plan’s 300 emails/day limit makes it feel unworthy for running a real newsletter on most blogs or business sites — you’ll hit that ceiling fast if you have any real subscriber base. But for just adding a contact form to your site, the Free plan is genuinely enough for most normal blogs and business websites. It also doesn’t affect your Core Web Vitals the way many WordPress contact-form plugins do, and it comes with better spam handling and delivery reliability out of the box than most free form plugins offer.
Why Domain Authentication Matters
Before Brevo will send emails on your behalf, it needs proof that you actually own the domain you’re sending from. This is done by adding a few DNS records — a TXT record (verification), two CNAME records (DKIM, for email authentication), and a DMARC record (spam/spoofing protection) — to wherever your domain’s DNS is managed.
If you skip this step, your emails are far more likely to land in spam, or Brevo may restrict your sending limits.
In many cases, domain verification happens automatically within a couple of minutes, without you needing to touch any DNS records yourself. If that happens for you, you can skip straight to sending campaigns. If automatic verification doesn’t go through, or you’d rather confirm the records yourself, follow the manual steps below.
If you’re wondering whether Brevo also needs an SPF record alongside these DNS entries, we tested this on our own dashboard — see our Brevo SPF DKIM setup guide for the answer.
Signing Up and Getting Your DNS Records
- Sign up on Brevo using any email address or your Google account.
- During signup, you’ll be asked for your address, mobile number, and time zone.
- Brevo will then prompt you for domain verification — this is where it gives you the DNS records you need to add.
Brevo will show records like this:
Type: TXT
Name: @
Content: brevo-code:2be6a1a865a7f136fee6...
Plus two DKIM CNAME records and one DMARC record. Copy these exactly — you’ll paste them into your DNS provider next.
Where you add them depends on where your domain’s DNS is managed, not where it’s hosted. If your site uses Cloudflare for DNS, add them there. If you manage DNS directly through your hosting provider (like Hostinger), add them there instead.
Adding Brevo DNS Records in Cloudflare
(Assumes your domain is already connected to Cloudflare — we’re not covering that setup here.)
- Log in to Cloudflare and select your website.
- In the left sidebar, click DNS → Records.
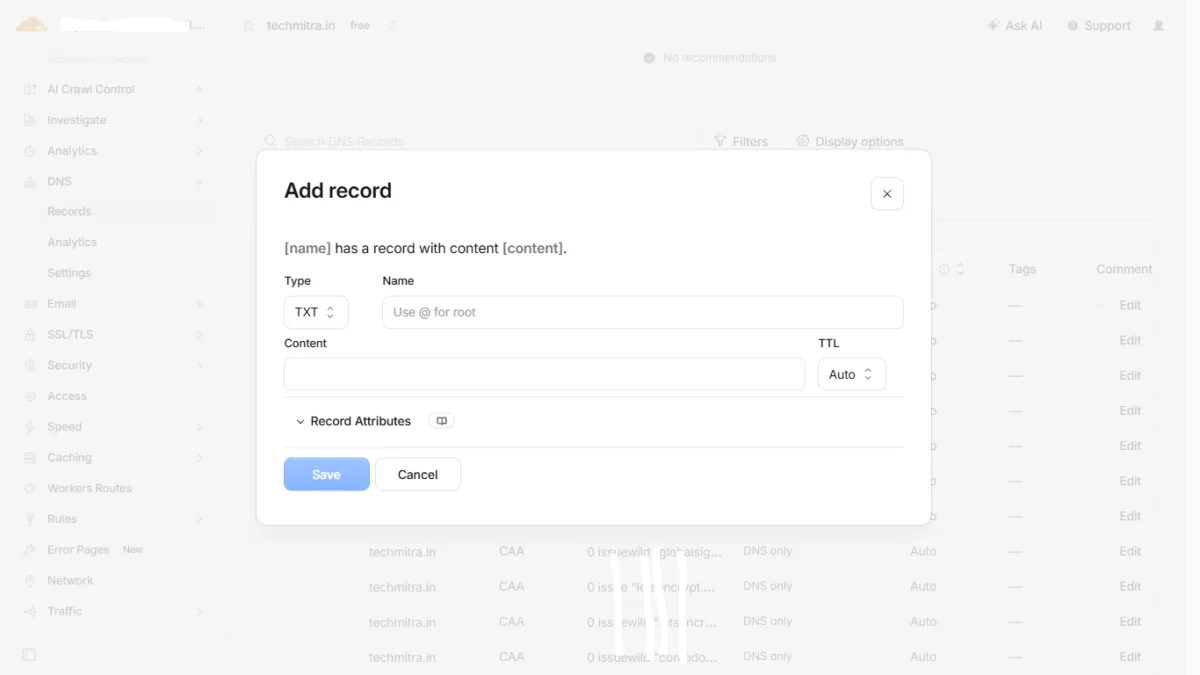
- Click Add record.
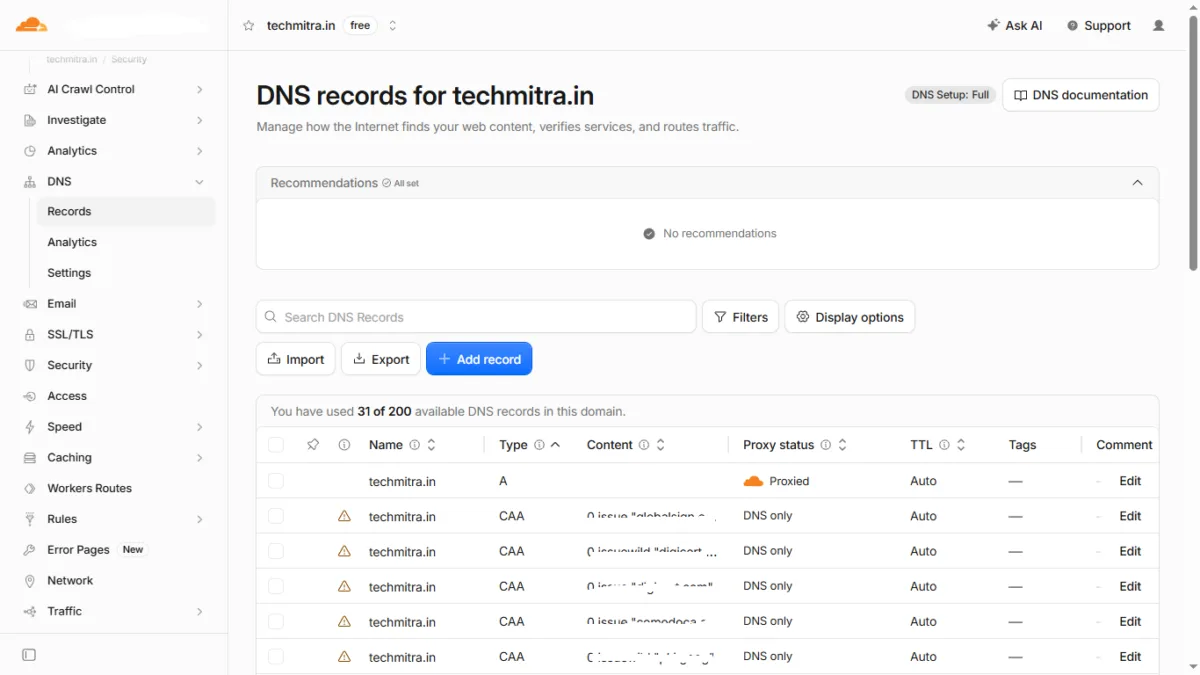
- For the TXT verification record: set Type to
TXT, Name to@, and paste Brevo’s content value into the Content field. Click Save.
- Repeat for the DKIM and DMARC records. The two DKIM records are CNAME type — set Type to
CNAME, fill in the Name and Target fields exactly as Brevo provides them.
Note: Brevo often gives DKIM hostnames like mail._domainkey or brevo._domainkey. Some DNS managers automatically append @ or your domain name to whatever you type in the Name field, while others need the full hostname. If verification fails, check whether your provider added the domain twice (e.g., mail._domainkey.yourdomain.com.yourdomain.com) and adjust accordingly.
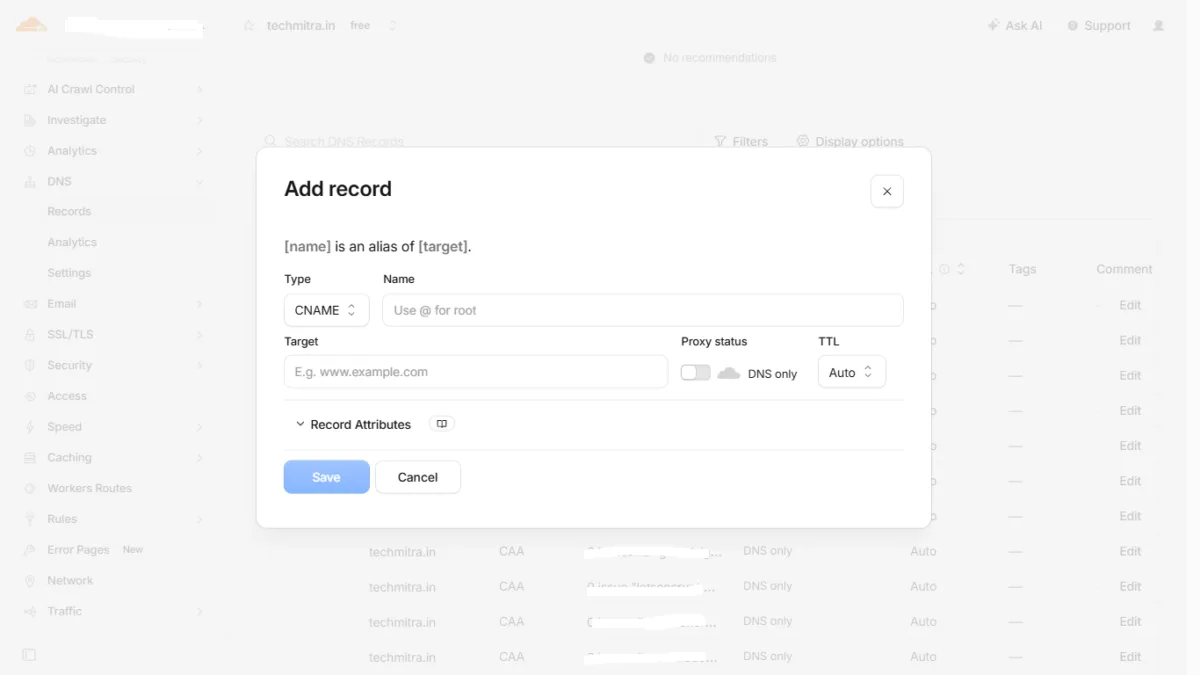
- Important: for the CNAME records, turn the Proxy status toggle OFF, so it shows a grey cloud (DNS only) — not the orange “Proxied” cloud. Brevo doesn’t need Cloudflare’s proxy for these records, and leaving it proxied can break verification.
Adding DNS Records in Hostinger
If your domain’s DNS is managed through Hostinger instead of Cloudflare, the process is similar but through Hostinger’s hPanel:
- Log in to hPanel.
- Click Websites in the left sidebar, select the website you want to connect to Brevo, and open its dashboard.
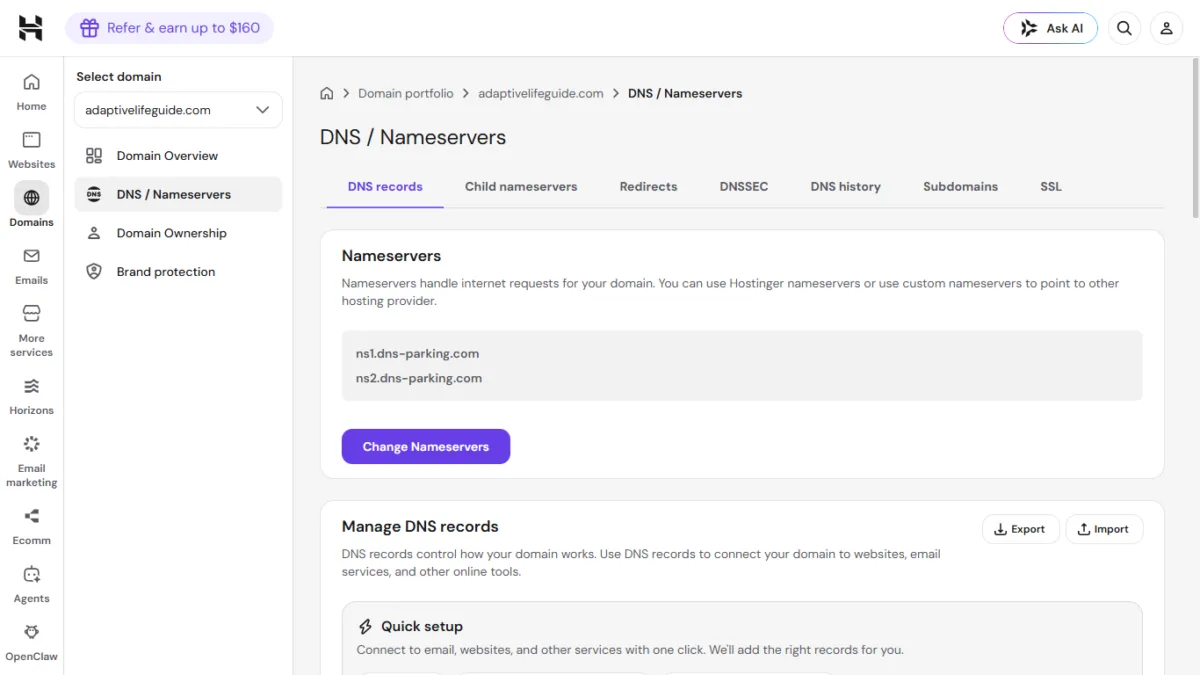
- Click Advanced in the left sidebar, then DNS Zone Editor.
- This opens the DNS/Nameservers page. Scroll down to Manage DNS records.
- Add the same records Brevo gave you. For the TXT verification record: set Type to
TXT, Name to@, and paste Brevo’s content into the Value field. Click Add Record.
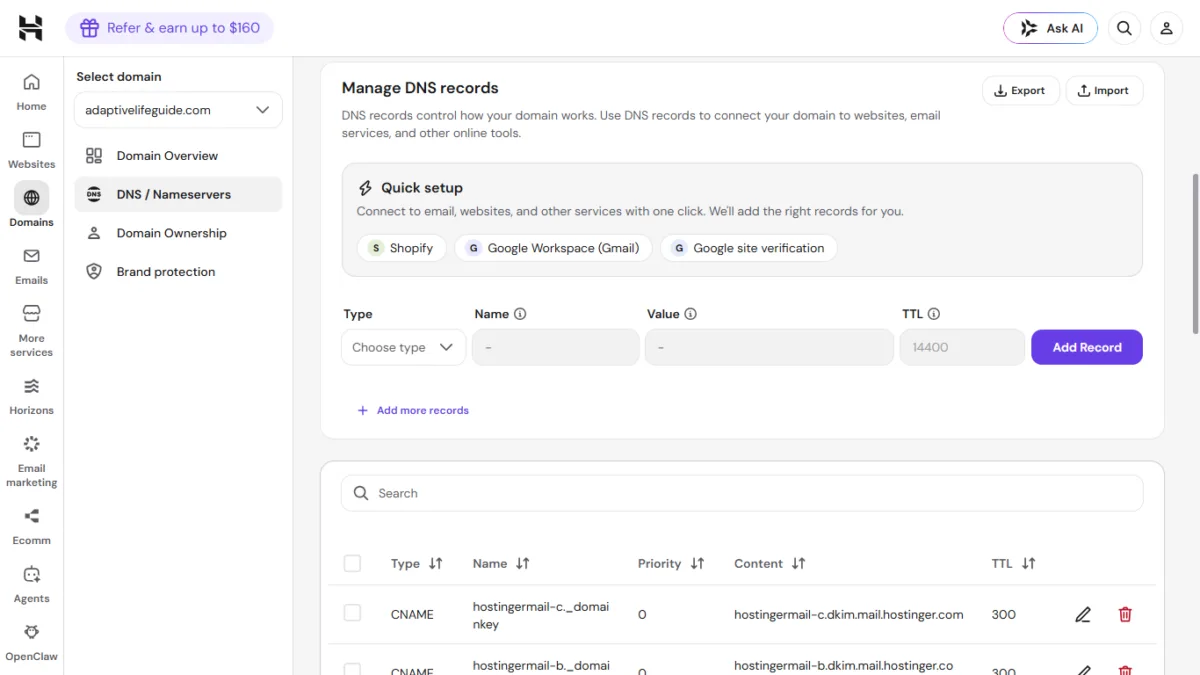
- Repeat for the DKIM CNAME records and the DMARC record, exactly as provided by Brevo.
The exact menu names vary between hosting providers — GoDaddy, Bluehost, Namecheap, and SiteGround all label this section slightly differently (“DNS Zone Editor,” “Advanced DNS,” or similar). But the underlying process is identical everywhere: find your DNS management page, then add the same TXT, CNAME, and DMARC records Brevo gives you, using the same Type/Name/Value fields shown here.
Once all records are added (on either platform), head back to Brevo and click verify — propagation can take anywhere from a few minutes to a few hours.
Common Mistakes to Avoid
- Leaving Cloudflare’s proxy ON for DKIM CNAME records — this is the single most common reason verification fails for Cloudflare users.
- Typos in the Name or Content/Value fields — copy-paste directly from Brevo rather than retyping.
- Adding records to the wrong DNS manager — if your domain uses Cloudflare’s nameservers, adding records in your hosting panel won’t do anything; Cloudflare is the source of truth.
- Adding a duplicate DMARC record — if you already have a DMARC TXT record from a previous email setup, update it to include Brevo’s requirements rather than adding a second one. Having multiple DMARC records for the same domain breaks DMARC compliance entirely, and can hurt deliverability for all your email, not just Brevo’s.
- Not waiting for propagation — if verification fails immediately after adding records, wait and retry rather than re-adding duplicate records.
Final Thoughts
Domain authentication looks intimidating the first time, but it’s really just copying a handful of records from Brevo into your DNS provider — the same process whether you’re on Cloudflare, Hostinger, or anywhere else. Once verified, your contact form and newsletter emails (see our no-plugin Brevo setup guide) will land reliably instead of getting flagged as spam.
Disclaimer: TechMitra is not affiliated with, sponsored by, or partnered with Brevo in any way. We’re simply users of the platform ourselves, and this article shares our honest, first-hand experience — including features we genuinely like — to help other website owners navigate Brevo’s setup and pricing. This is not a paid promotion.

Ayush Singhal is the founder and chief editor of TechMitra.in — a tech hub dedicated to simplifying gadgets, AI tools, and smart innovations for everyday users. With over 15 years of business experience, a Bachelor of Computer Applications (BCA) degree, and 5 years of hands-on experience running an electronics retail shop, Ayush brings real-world gadget knowledge and a genuine passion for emerging technology.
At TechMitra, he covers everything from AI breakthroughs and gadget reviews to app guides, mobile tips, and digital how-tos. His goal is simple — to make tech easy, useful, and enjoyable for everyone. When he’s not testing the latest devices or exploring AI trends, Ayush spends his time crafting tutorials that help readers make smarter digital choices.
📍 Based in Lucknow, India
💡 Focus Areas: Tech News • AI Tools • Gadgets • Digital How-Tos
📧 Contact: Get in touch →
🔗 Full Bio: https://techmitra.in/about-us/