

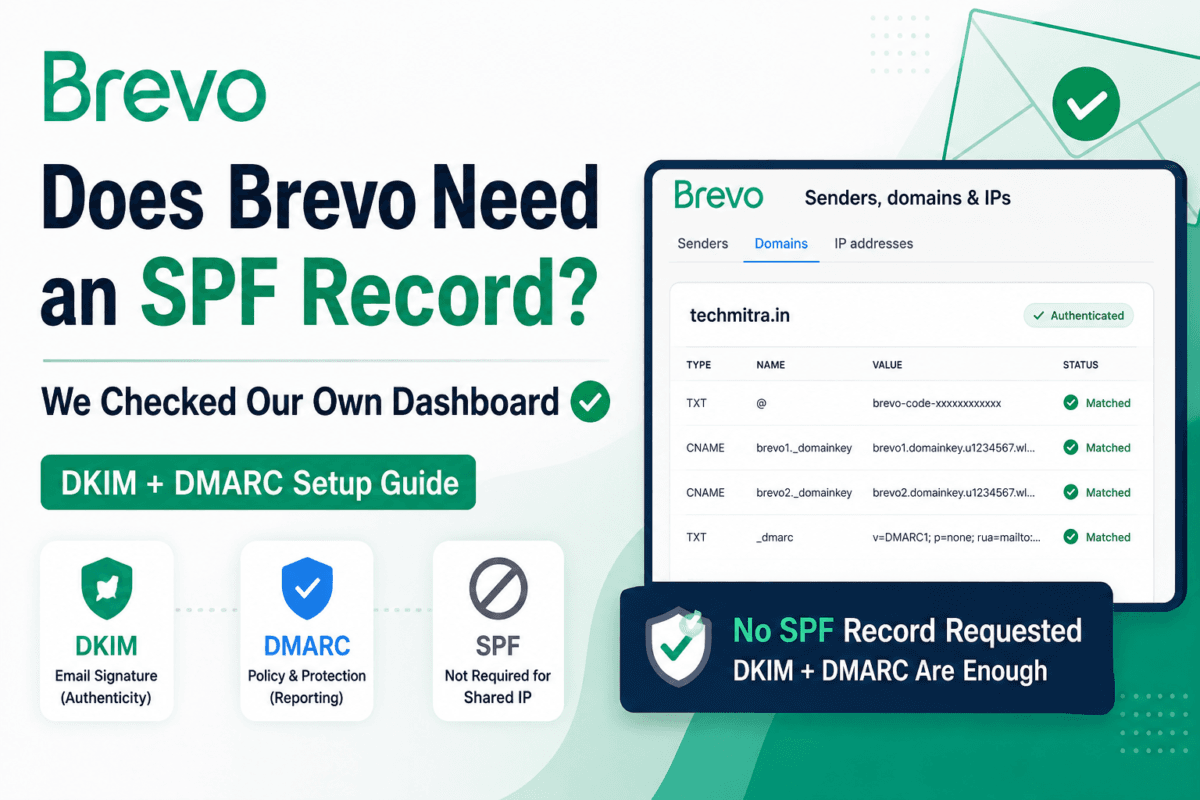
Image : Brevo SPF DKIM Setup: Do You Need SPF? (DMARC Guide)
If you’ve searched for a Brevo SPF and DKIM setup guide, you’ve probably landed on advice telling you to add all three — SPF, DKIM, and DMARC — before Brevo will send email reliably on your behalf. We went and checked our own live Brevo account for techmitra.in to see exactly what it actually asks for. In our shared-IP account, Brevo did not request an SPF record — it authenticated our domain using DKIM and DMARC instead. Other Brevo configurations, like dedicated IPs or newer authentication flows, may display different records, so always follow what your own Brevo dashboard actually shows you.
Here’s what SPF, DKIM, and DMARC actually do, why our account didn’t need SPF, and the exact records we added for our own domain — with the real dashboard screenshot to prove it.
What we tested
- Domain: techmitra.in
- Hosting: Hostinger
- DNS: Cloudflare
- Brevo plan: Shared IP
- Result: Authentication completed successfully, no SPF record requested by Brevo
- Verified: August 2026 (Brevo’s authentication flow can change over time, so your dashboard may look different)
Table of Contents
Also Read: Brevo Explained: Brevo DNS Settings, Pricing, and Setup Guide
What Are SPF, DKIM, and DMARC?
These three are all email authentication protocols — DNS records that prove an email claiming to be from your domain actually is, and that it wasn’t tampered with along the way. Every major inbox provider (Gmail, Outlook, Yahoo) checks for these before deciding whether your email lands in the inbox or the spam folder.
SPF (Sender Policy Framework) is a DNS TXT record listing which mail servers are allowed to send email on behalf of your domain. The receiving server checks the IP address the email actually came from against this list. SPF authenticates the technical “envelope sender” — not necessarily the From: address a reader sees in their inbox.
DKIM (DomainKeys Identified Mail) attaches a cryptographic signature to every outgoing email. The sending service (Brevo, in this case) signs the message with a private key, and the receiving server checks that signature against a public key published in your DNS — the CNAME records you’ll see below. This proves two things: the email genuinely came from an authorized sender, and its content wasn’t altered in transit.
DMARC (Domain-based Message Authentication, Reporting & Conformance) sits on top of both. It’s a policy record that tells receiving servers what to do if a message fails SPF and DKIM checks — reject it, send it to spam, or just let it through and report the failure. Crucially, DMARC only requires one of SPF or DKIM to pass, not both. That one detail is the whole reason Brevo can skip SPF entirely and still pass DMARC using DKIM alone.
Does Brevo Need an SPF Record? Why Doesn’t Brevo Show One?
This is the part most setup guides gloss over. Brevo sends your emails through its own infrastructure, and SPF is checked against the “envelope sender” domain — which, for Brevo’s shared-IP outgoing mail, is controlled by Brevo’s own servers, not yours. Adding an SPF record like include:spf.brevo.com to your DNS wouldn’t authenticate anything extra in that setup, because the envelope sender still won’t align with your domain the way SPF checks expect.
Since DMARC only needs SPF or DKIM to pass — and Brevo already handles DKIM signing properly through the records it gives you — there’s nothing missing by skipping SPF on a shared-IP account. It’s not an oversight on Brevo’s part; it’s simply not part of how their shared-sending architecture works.
Proof: Our Own Brevo Dashboard for techmitra.in
Instead of taking this on faith, we checked our own domain authentication page inside Brevo (Settings → Senders, domains, IPs → your domain). Here’s exactly what it asks for:
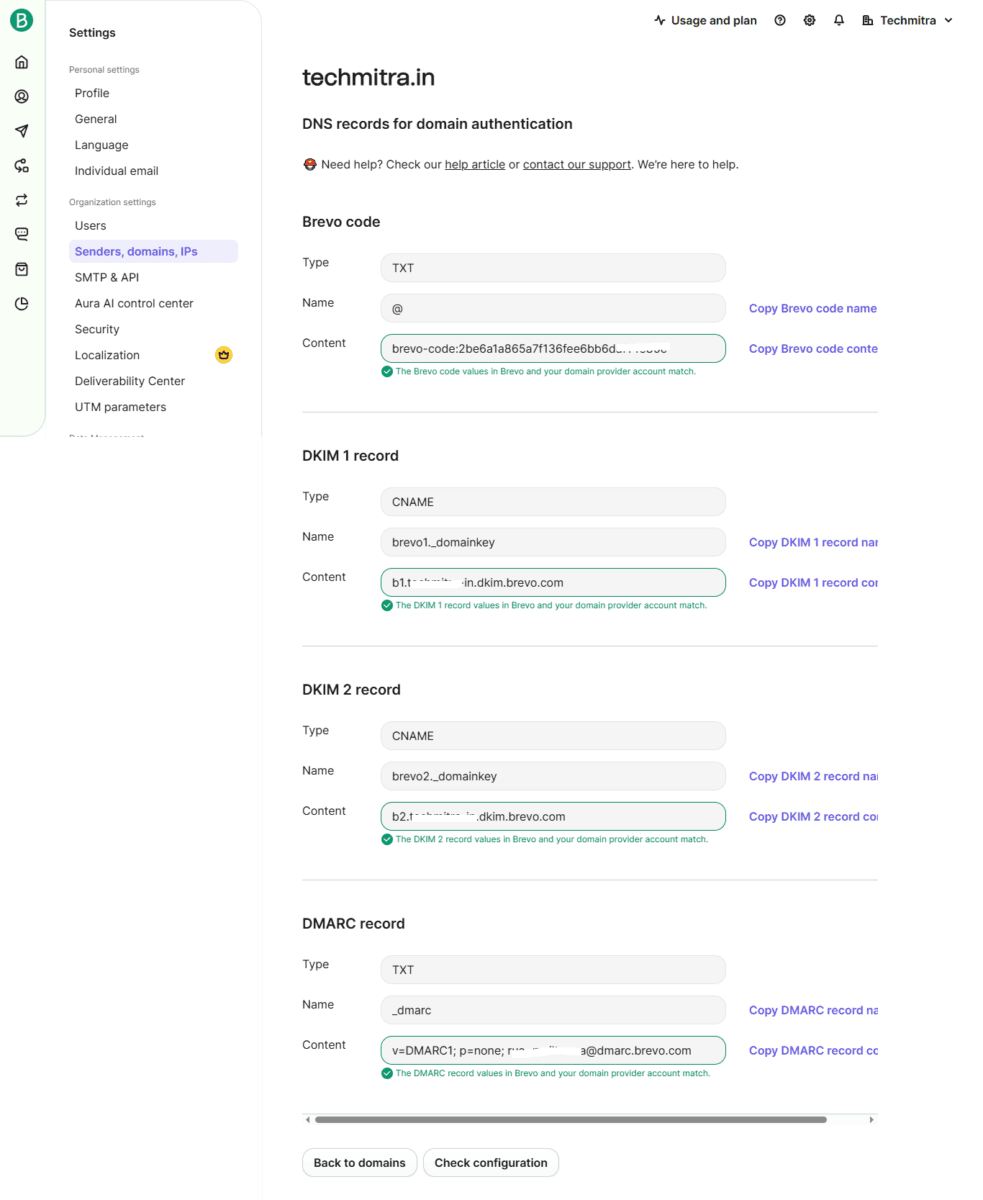
Four records, all green and matched:
| Record | Type | Name | Purpose |
|---|---|---|---|
| Brevo code | TXT | @ | Domain ownership verification |
| DKIM 1 | CNAME | brevo1._domainkey | Email signature key #1 |
| DKIM 2 | CNAME | brevo2._domainkey | Email signature key #2 |
| DMARC | TXT | _dmarc | Policy + failure reporting |
No SPF row. Not hidden under an “advanced” tab, not optional-but-recommended — it simply isn’t part of the setup Brevo asks for.
A quick note if your own dashboard looks slightly different: Brevo’s DKIM record shape varies by account. Some accounts show two DKIM CNAME records, like ours does; others show a single DKIM TXT record instead. Either version does the same job — just publish whatever your own Brevo dashboard shows you, rather than assuming it should look exactly like this screenshot.
Brevo Shared IP vs Dedicated IP Authentication
This is for shared IP sending. Everything above applies if you’re on Brevo’s Free, Starter, or Standard plans, sending through Brevo’s shared infrastructure — which is what our own setup uses. If you’ve bought a dedicated IP from Brevo, the picture changes: with a dedicated IP, the Return-Path can be set to your own domain, so SPF can align and Brevo will give you an SPF record to add in that case. If your dashboard shows an SPF row, it’s because you’re on a dedicated IP — publish exactly what it gives you.
Brevo’s authentication flow has also changed over time, so dedicated IP customers may see additional DNS records — including SPF — depending on their account and setup. If your dashboard doesn’t match this article exactly, trust your own dashboard over any tutorial, including this one.
Step-by-Step: Adding the Brevo DKIM and DMARC Records
The actual process of adding these records to your DNS — whether you’re on Cloudflare or Hostinger — is exactly what we covered in our Brevo DNS settings and pricing guide, including the exact screens for both providers. The short version:
- Sign up on Brevo and add your domain under Senders, Domains, and IPs.
- Brevo generates your Brevo code (TXT), two DKIM records (CNAME), and a DMARC record (TXT).
- Copy each record’s Name and Content exactly, and add them in your DNS provider’s dashboard — Cloudflare’s DNS → Records screen, or Hostinger’s DNS Zone Editor.
- Back in Brevo, click “Check configuration” to verify. DNS propagation can take anywhere from a few minutes to a few hours.
For Brevo’s own reference on this process, see their official guide: Authenticate your domain with Brevo (Brevo code, DKIM, DMARC).
One warning if your domain already sends email elsewhere (Google Workspace, another ESP, etc.): if you already have a DMARC record published, don’t use Brevo’s automatic authentication flow — it can offer to replace your existing DMARC record with its own. A domain should only ever have one DMARC record, and replacing yours without checking its policy and reporting address first could break authentication for your other senders. Use manual authentication instead, so you can add Brevo’s DKIM records without touching your existing DMARC setup.
Should I Add include:spf.brevo.com?
If you’ve seen older guides or forum threads suggesting you manually add include:spf.brevo.com (or the old spf.sendinblue.com) as an SPF record — for the shared-IP setup shown in this article, it isn’t necessary, since DKIM already provides DMARC alignment on its own. If your Brevo dashboard explicitly asks for an SPF record (which can happen on dedicated IP or newer authentication flows), publish the record Brevo provides in your account rather than copying values from older tutorials.
If your domain already has an SPF record — for Google Workspace, Microsoft 365, Zoho, or another email provider — don’t delete or replace it just because Brevo didn’t request one. A domain should publish only one SPF record at its root, which can authorize multiple sending services at once using multiple include: mechanisms inside that single record.
Frequently Asked Questions
Does Brevo require SPF?
Not always. In our shared-IP account, Brevo requested DKIM and DMARC but no SPF record. Dedicated IP accounts or newer authentication flows may show an SPF record — follow whatever your own dashboard displays.
Can I use Brevo with an existing SPF record?
Yes. If your domain already uses Google Workspace, Microsoft 365, or another provider with its own SPF record, keep it as-is unless Brevo specifically instructs you to modify it.
Why doesn’t my dashboard match yours?
Brevo’s authentication flow varies between accounts and can change over time — some accounts show two DKIM CNAME records, others a single DKIM TXT record, and dedicated IP accounts may include SPF. Always use the DNS records shown in your own dashboard rather than assuming it should match any single article, including this one.
Does Brevo require SPF? Not always. In our shared-IP account, Brevo requested DKIM and DMARC but no SPF record. Dedicated IP accounts or newer authentication flows may show an SPF record — follow whatever your own dashboard displays.
Can I use Brevo with an existing SPF record? Yes. If your domain already uses Google Workspace, Microsoft 365, or another provider with its own SPF record, keep it as-is unless Brevo specifically instructs you to modify it.
Why doesn’t my dashboard match yours? Brevo’s authentication flow varies between accounts and can change over time — some accounts show two DKIM CNAME records, others a single DKIM TXT record, and dedicated IP accounts may include SPF. Always use the DNS records shown in your own dashboard rather than assuming it should match any single article, including this one.
Setting Up Brevo ( Without Plugin ) for Your Site?
If you haven’t set up Brevo yet, our guide on using Brevo’s contact form and newsletter without any WordPress plugin covers why we moved to it and exactly how the forms are embedded. Once your forms are live, domain authentication with DKIM and DMARC — not SPF — is the only DNS step left to get your emails landing in the inbox instead of spam.

Ayush Singhal is the founder and chief editor of TechMitra.in — a tech hub dedicated to simplifying gadgets, AI tools, and smart innovations for everyday users. With over 15 years of business experience, a Bachelor of Computer Applications (BCA) degree, and 5 years of hands-on experience running an electronics retail shop, Ayush brings real-world gadget knowledge and a genuine passion for emerging technology.
At TechMitra, he covers everything from AI breakthroughs and gadget reviews to app guides, mobile tips, and digital how-tos. His goal is simple — to make tech easy, useful, and enjoyable for everyone. When he’s not testing the latest devices or exploring AI trends, Ayush spends his time crafting tutorials that help readers make smarter digital choices.
📍 Based in Lucknow, India
💡 Focus Areas: Tech News • AI Tools • Gadgets • Digital How-Tos
📧 Contact: Get in touch →
🔗 Full Bio: https://techmitra.in/about-us/